Quick Start Guide
Get up and running with Data Phantom in minutes. This visual guide walks you through creating your first playground, tasks, and data reconciliation.
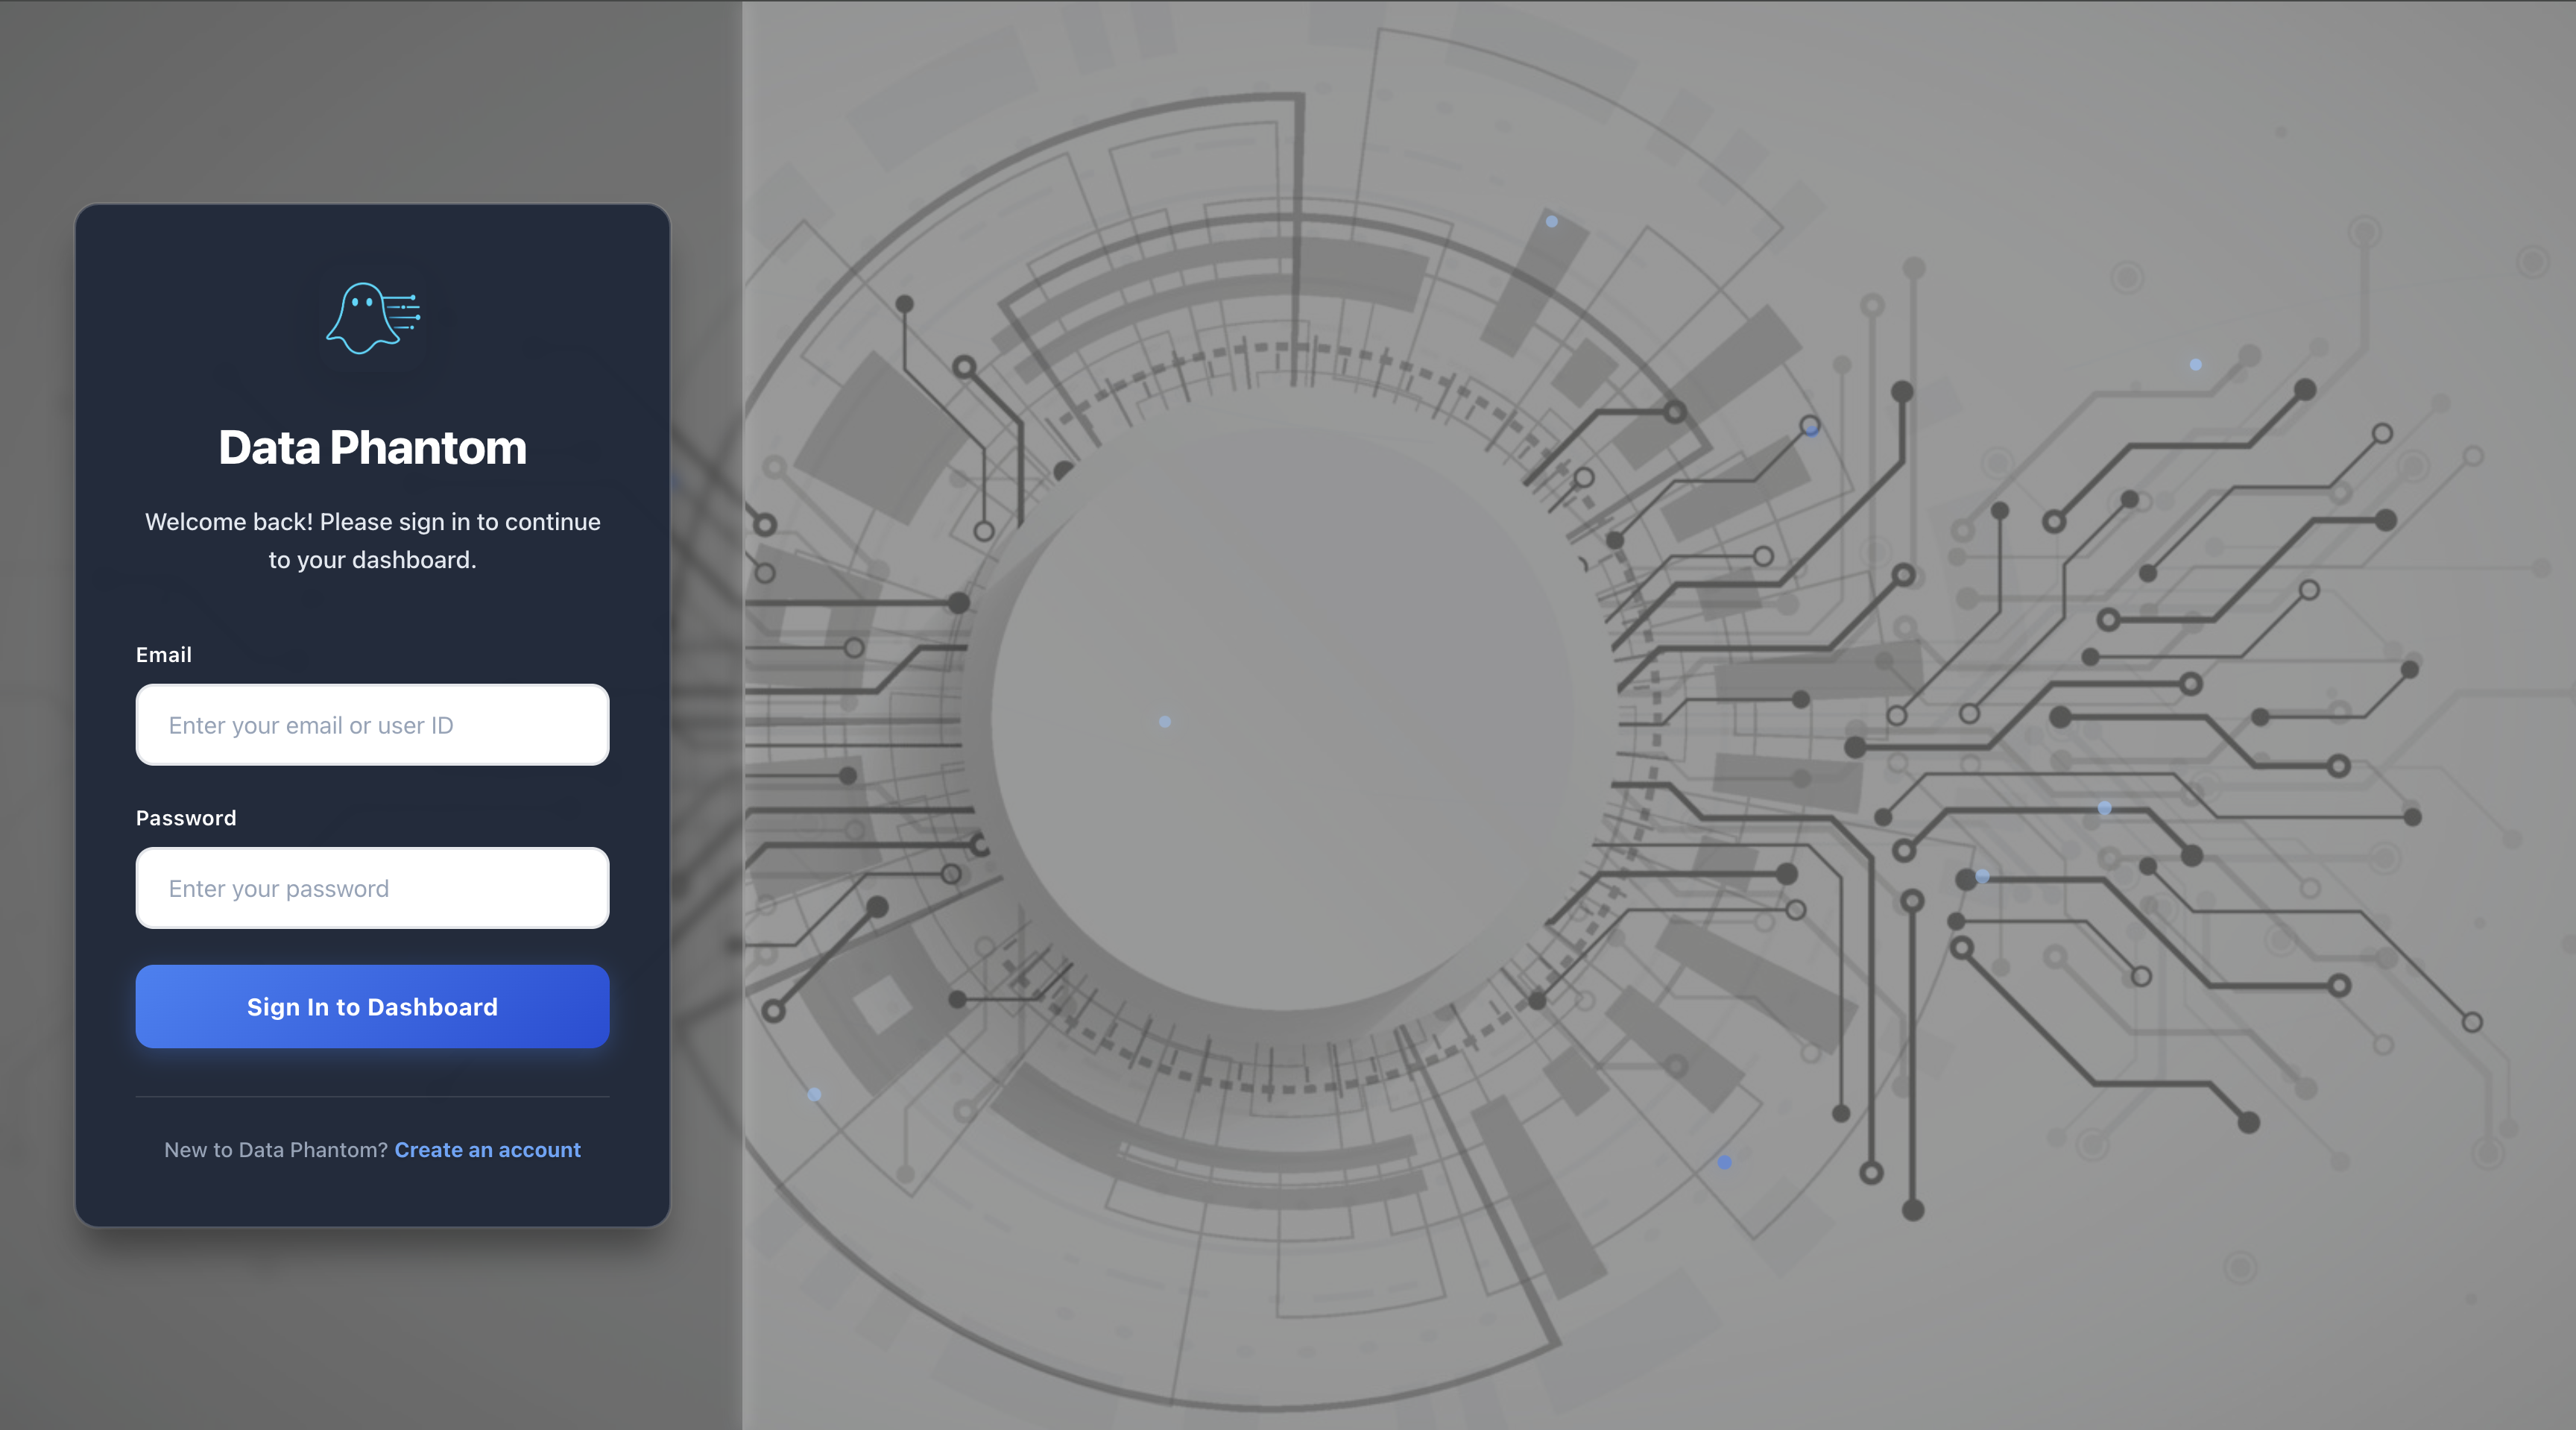
Login to Data Phantom
Access the Data Phantom dashboard by logging in with your credentials. If you're a new user, click on "Create an account" to register.
config-dev.yml.
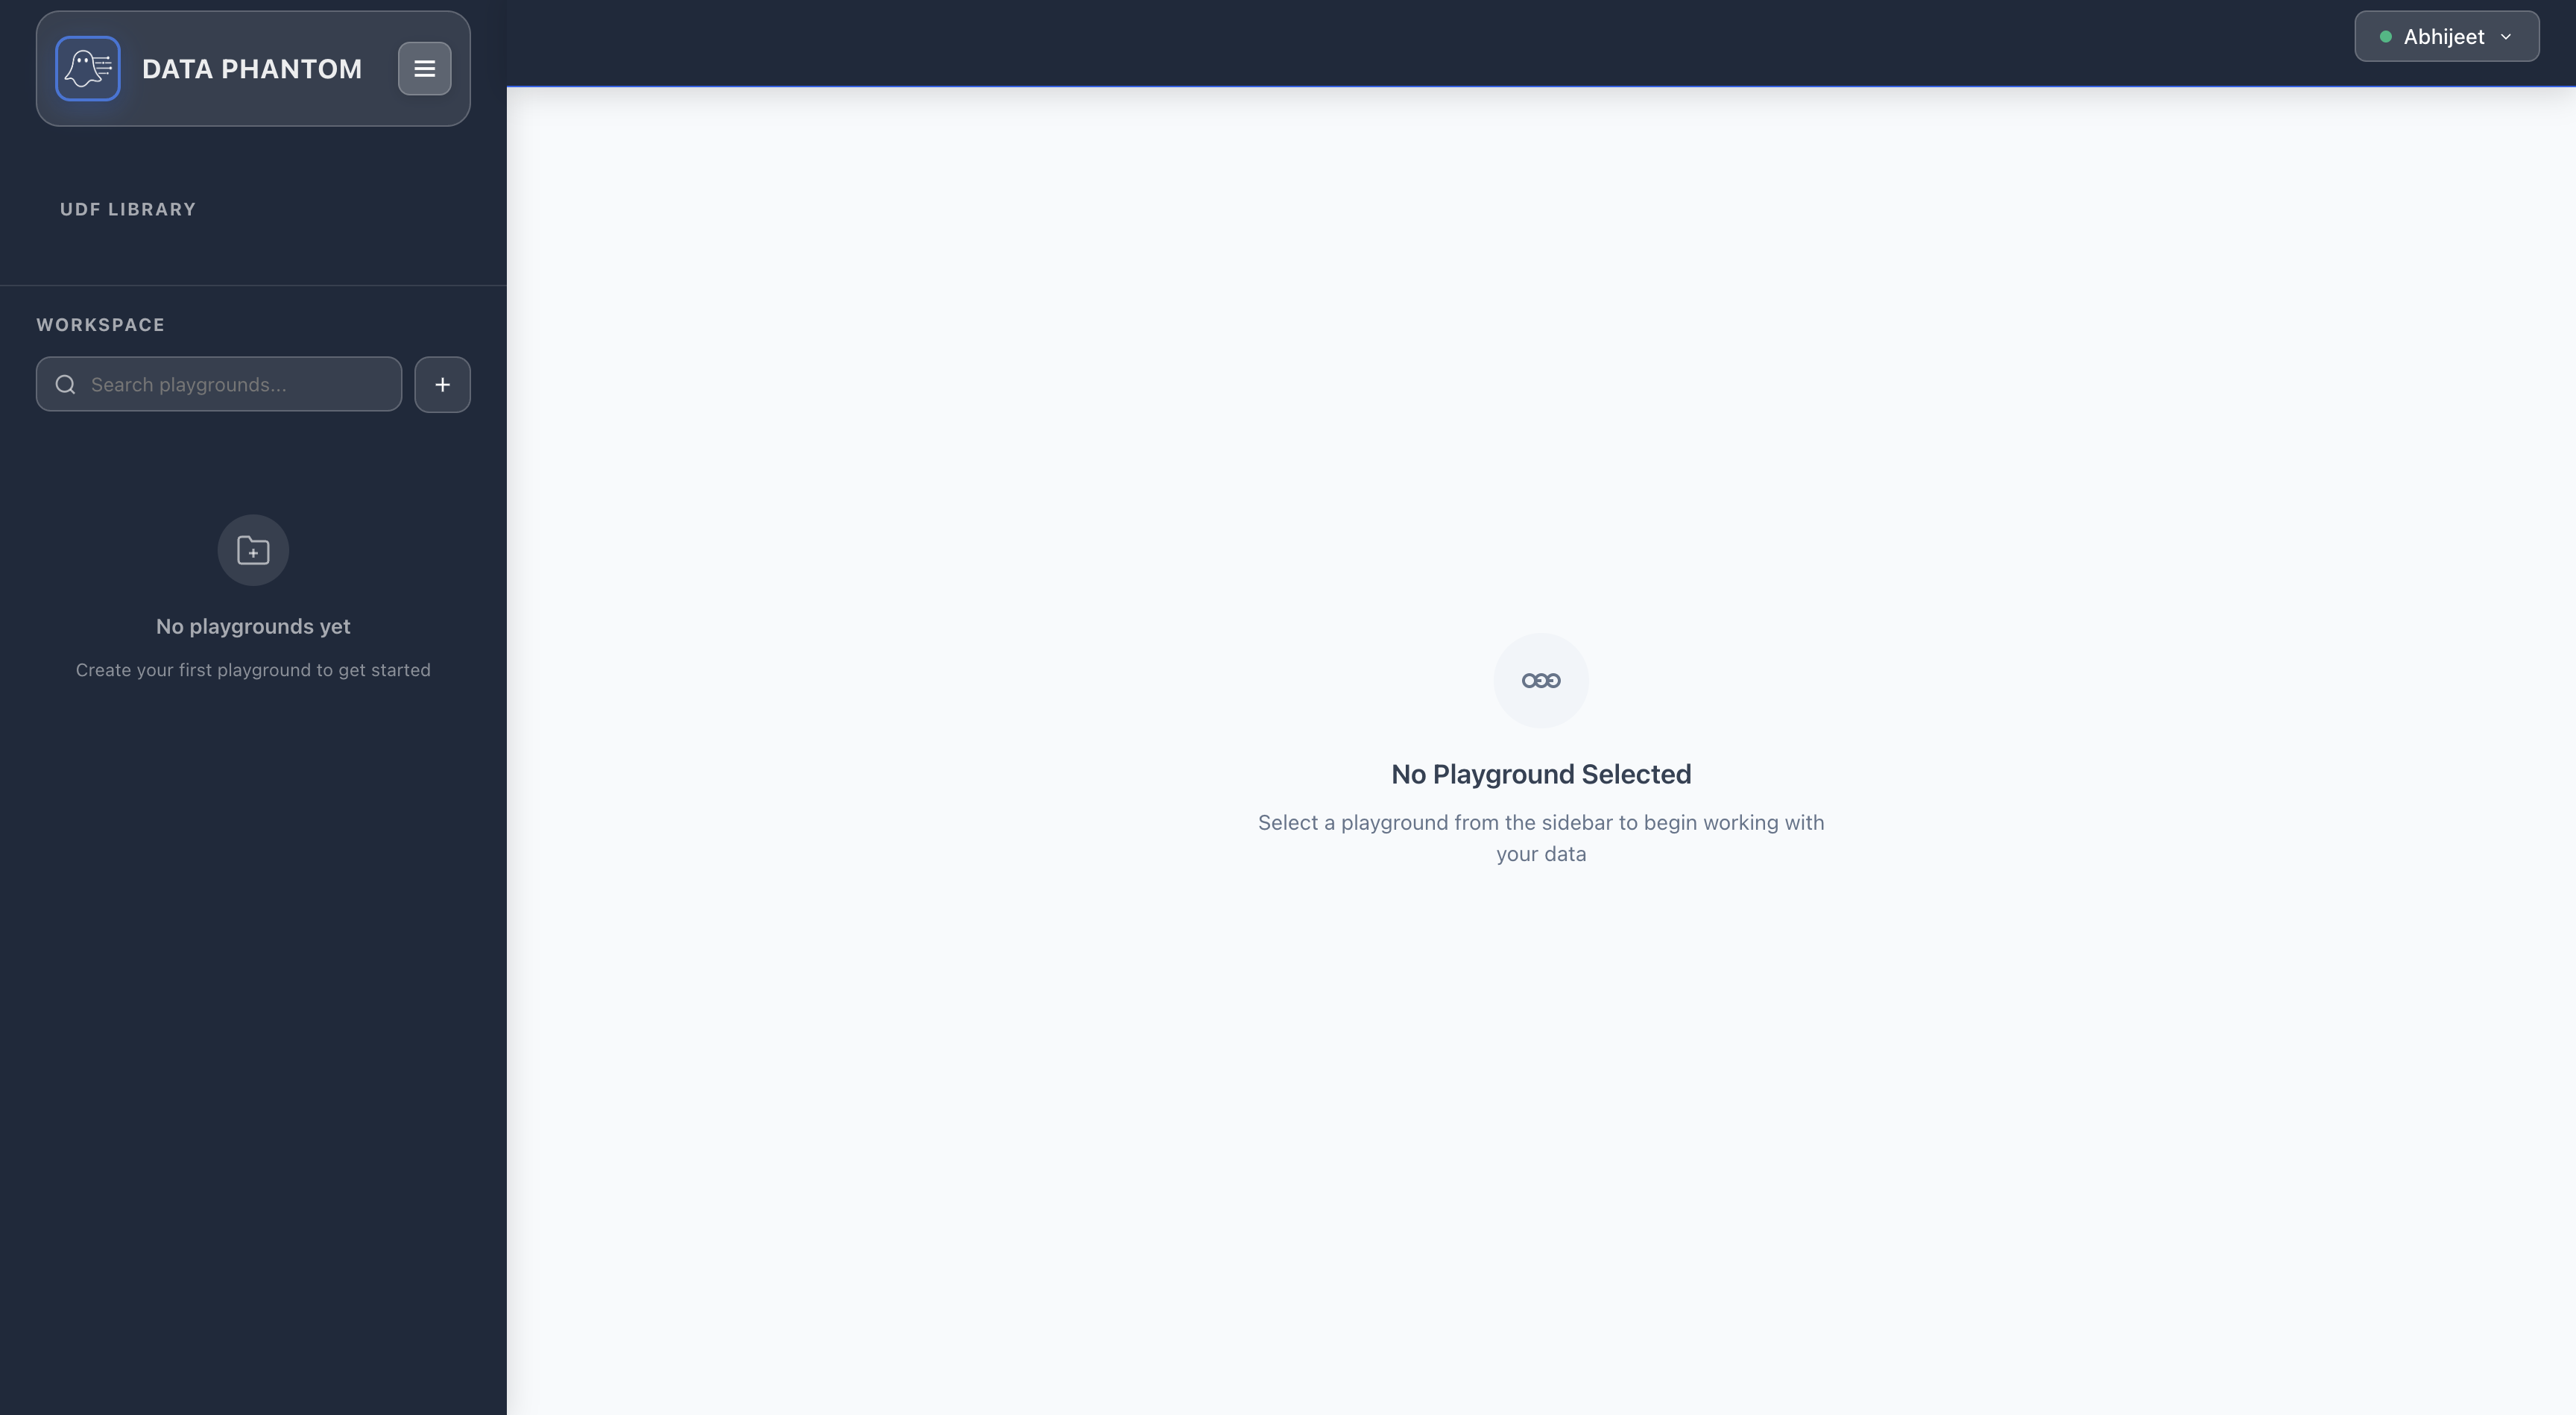
Explore the Dashboard
After logging in, you'll see the main dashboard with two key sections:
- UDF Library: Manage your User-Defined Functions
- Workspace: Create and manage playgrounds (data processing workflows)
Create Your First Playground
A playground is a container for related data processing tasks. Click the + button in the workspace sidebar to create one.

0 0 * * * for daily at midnight) or Quartz format. Leave empty for ad-hoc execution only.
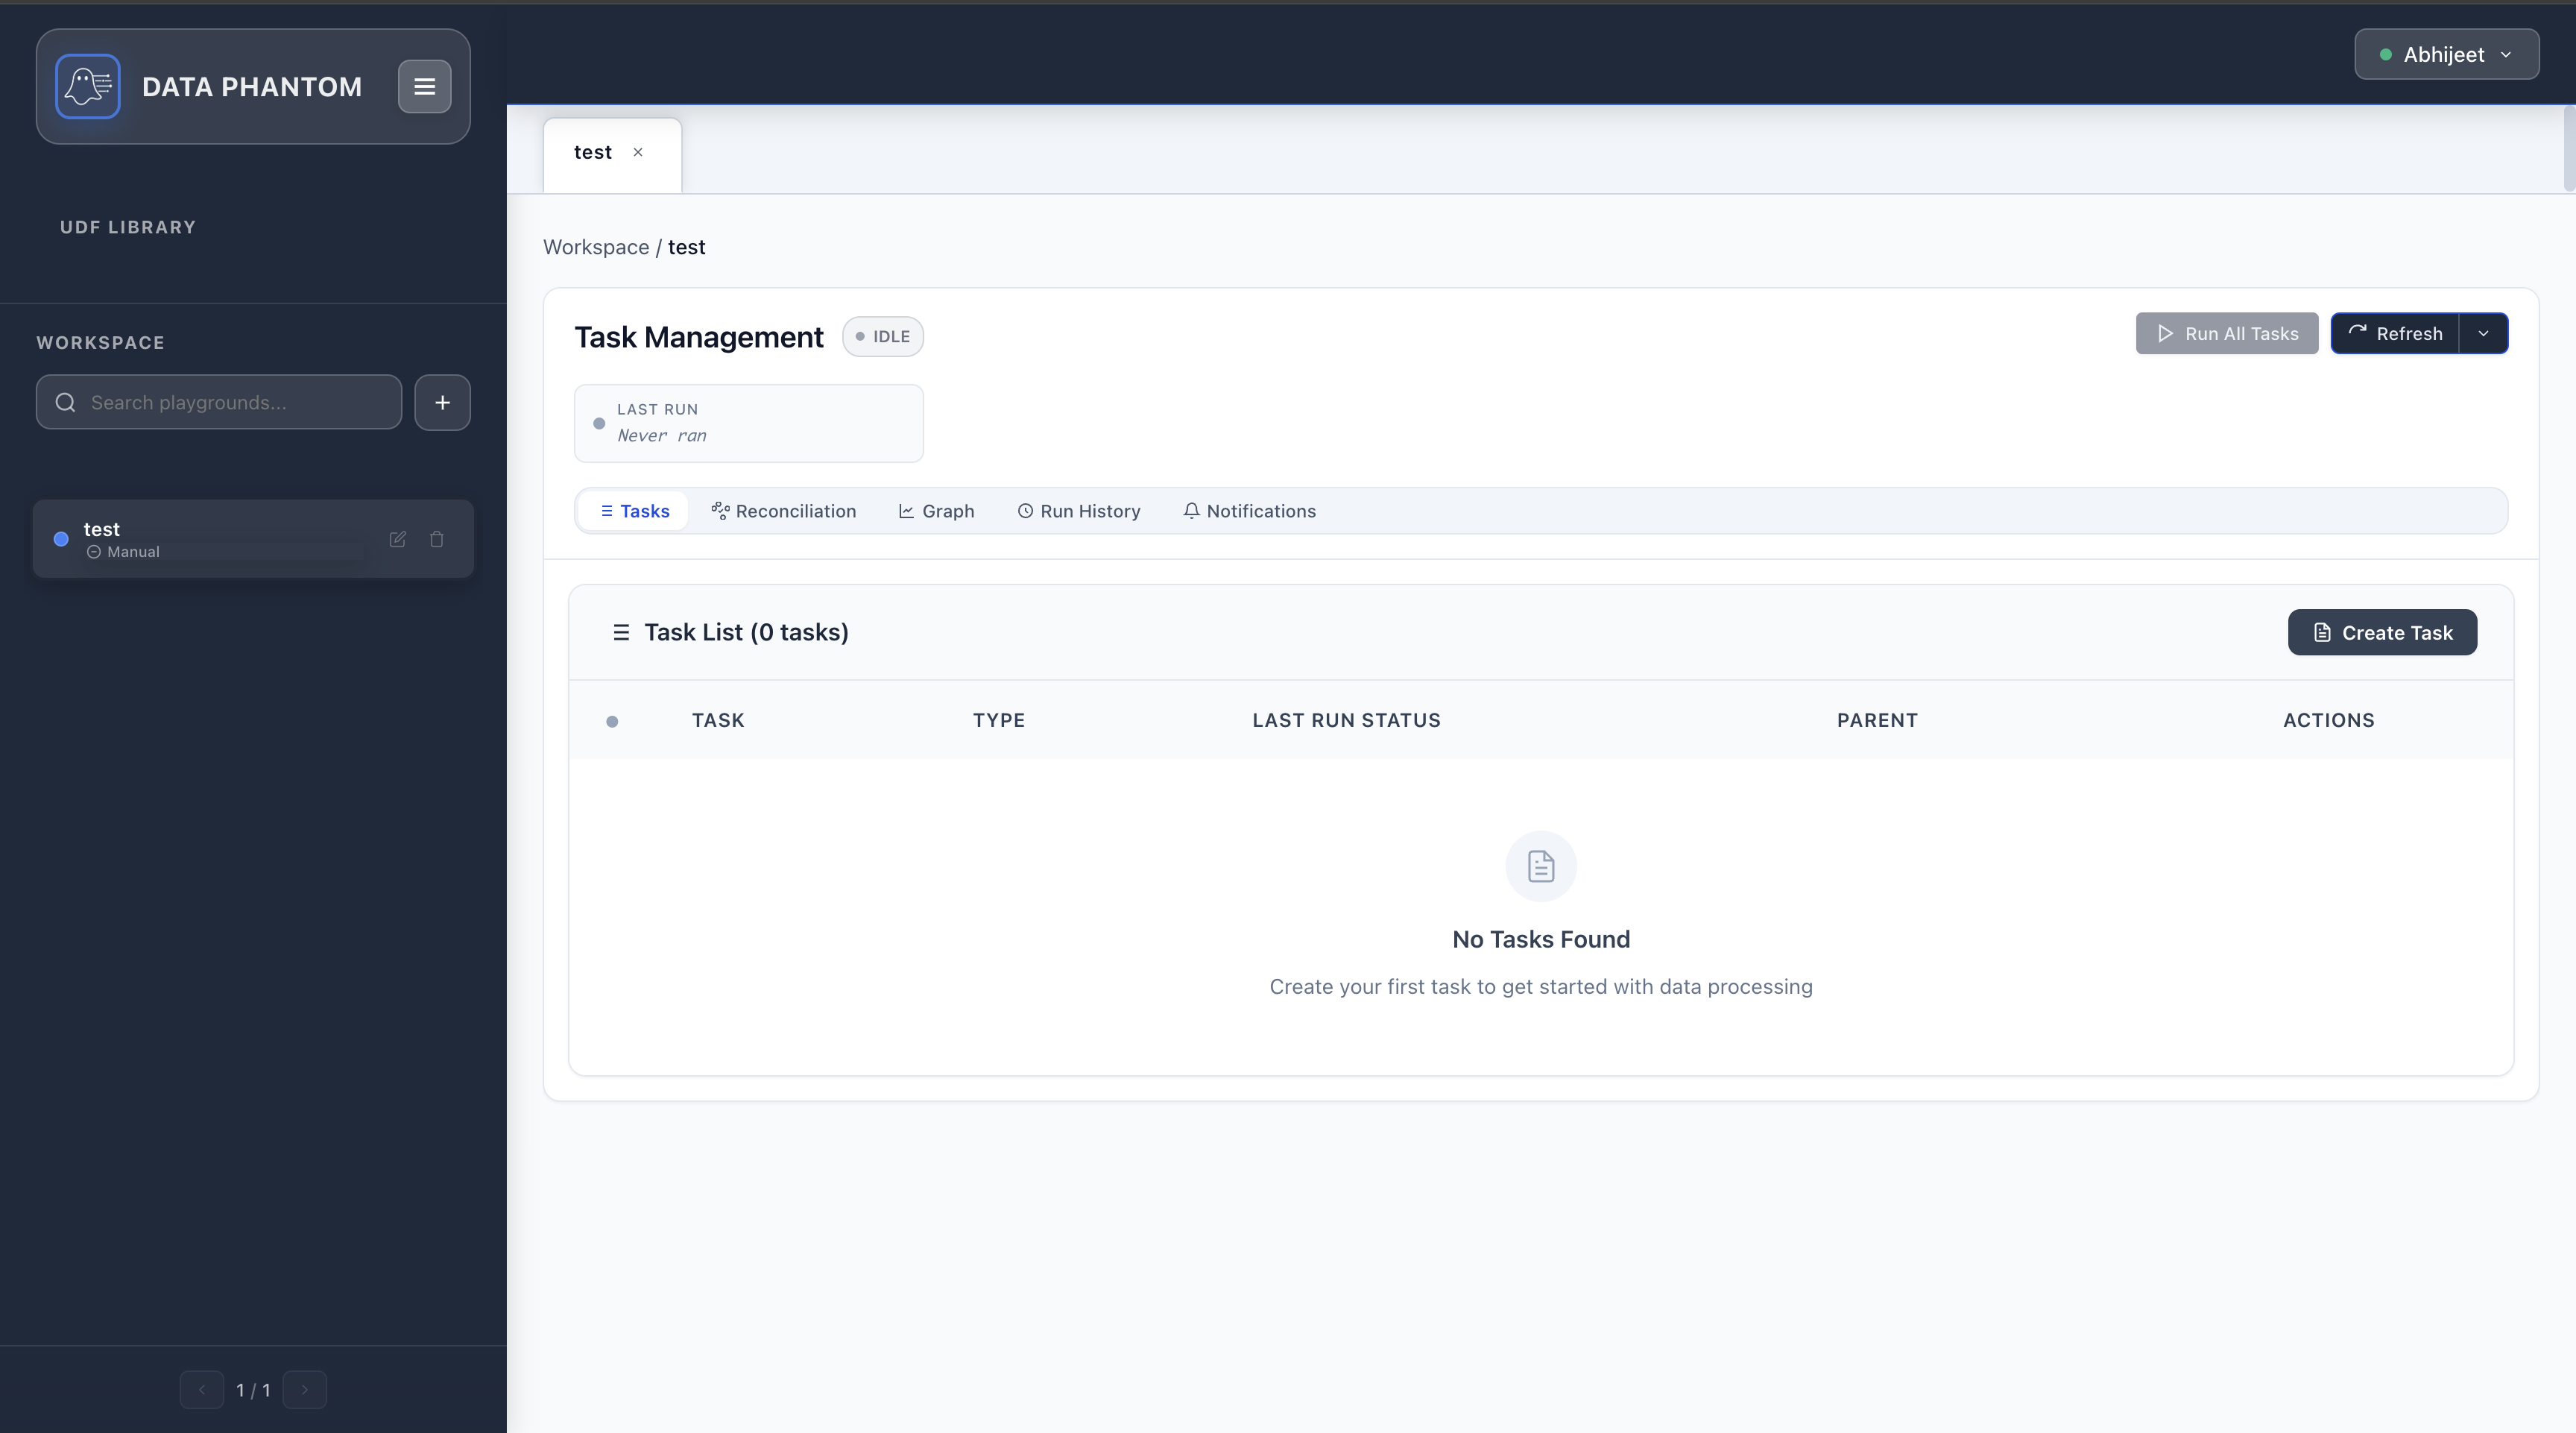
View Your Playground
Once created, your playground appears in the sidebar and opens in the main panel. You'll see the Task Management interface with several tabs:
- Tasks: Create and manage SQL tasks
- Reconciliation: Set up data validation between tasks
- Graph: Visualize task dependencies
- Run History: Track execution history
- Notifications: Configure email alerts
Create Your First Task
Tasks are individual SQL operations that process data. Click "Create Task" to add a new task.
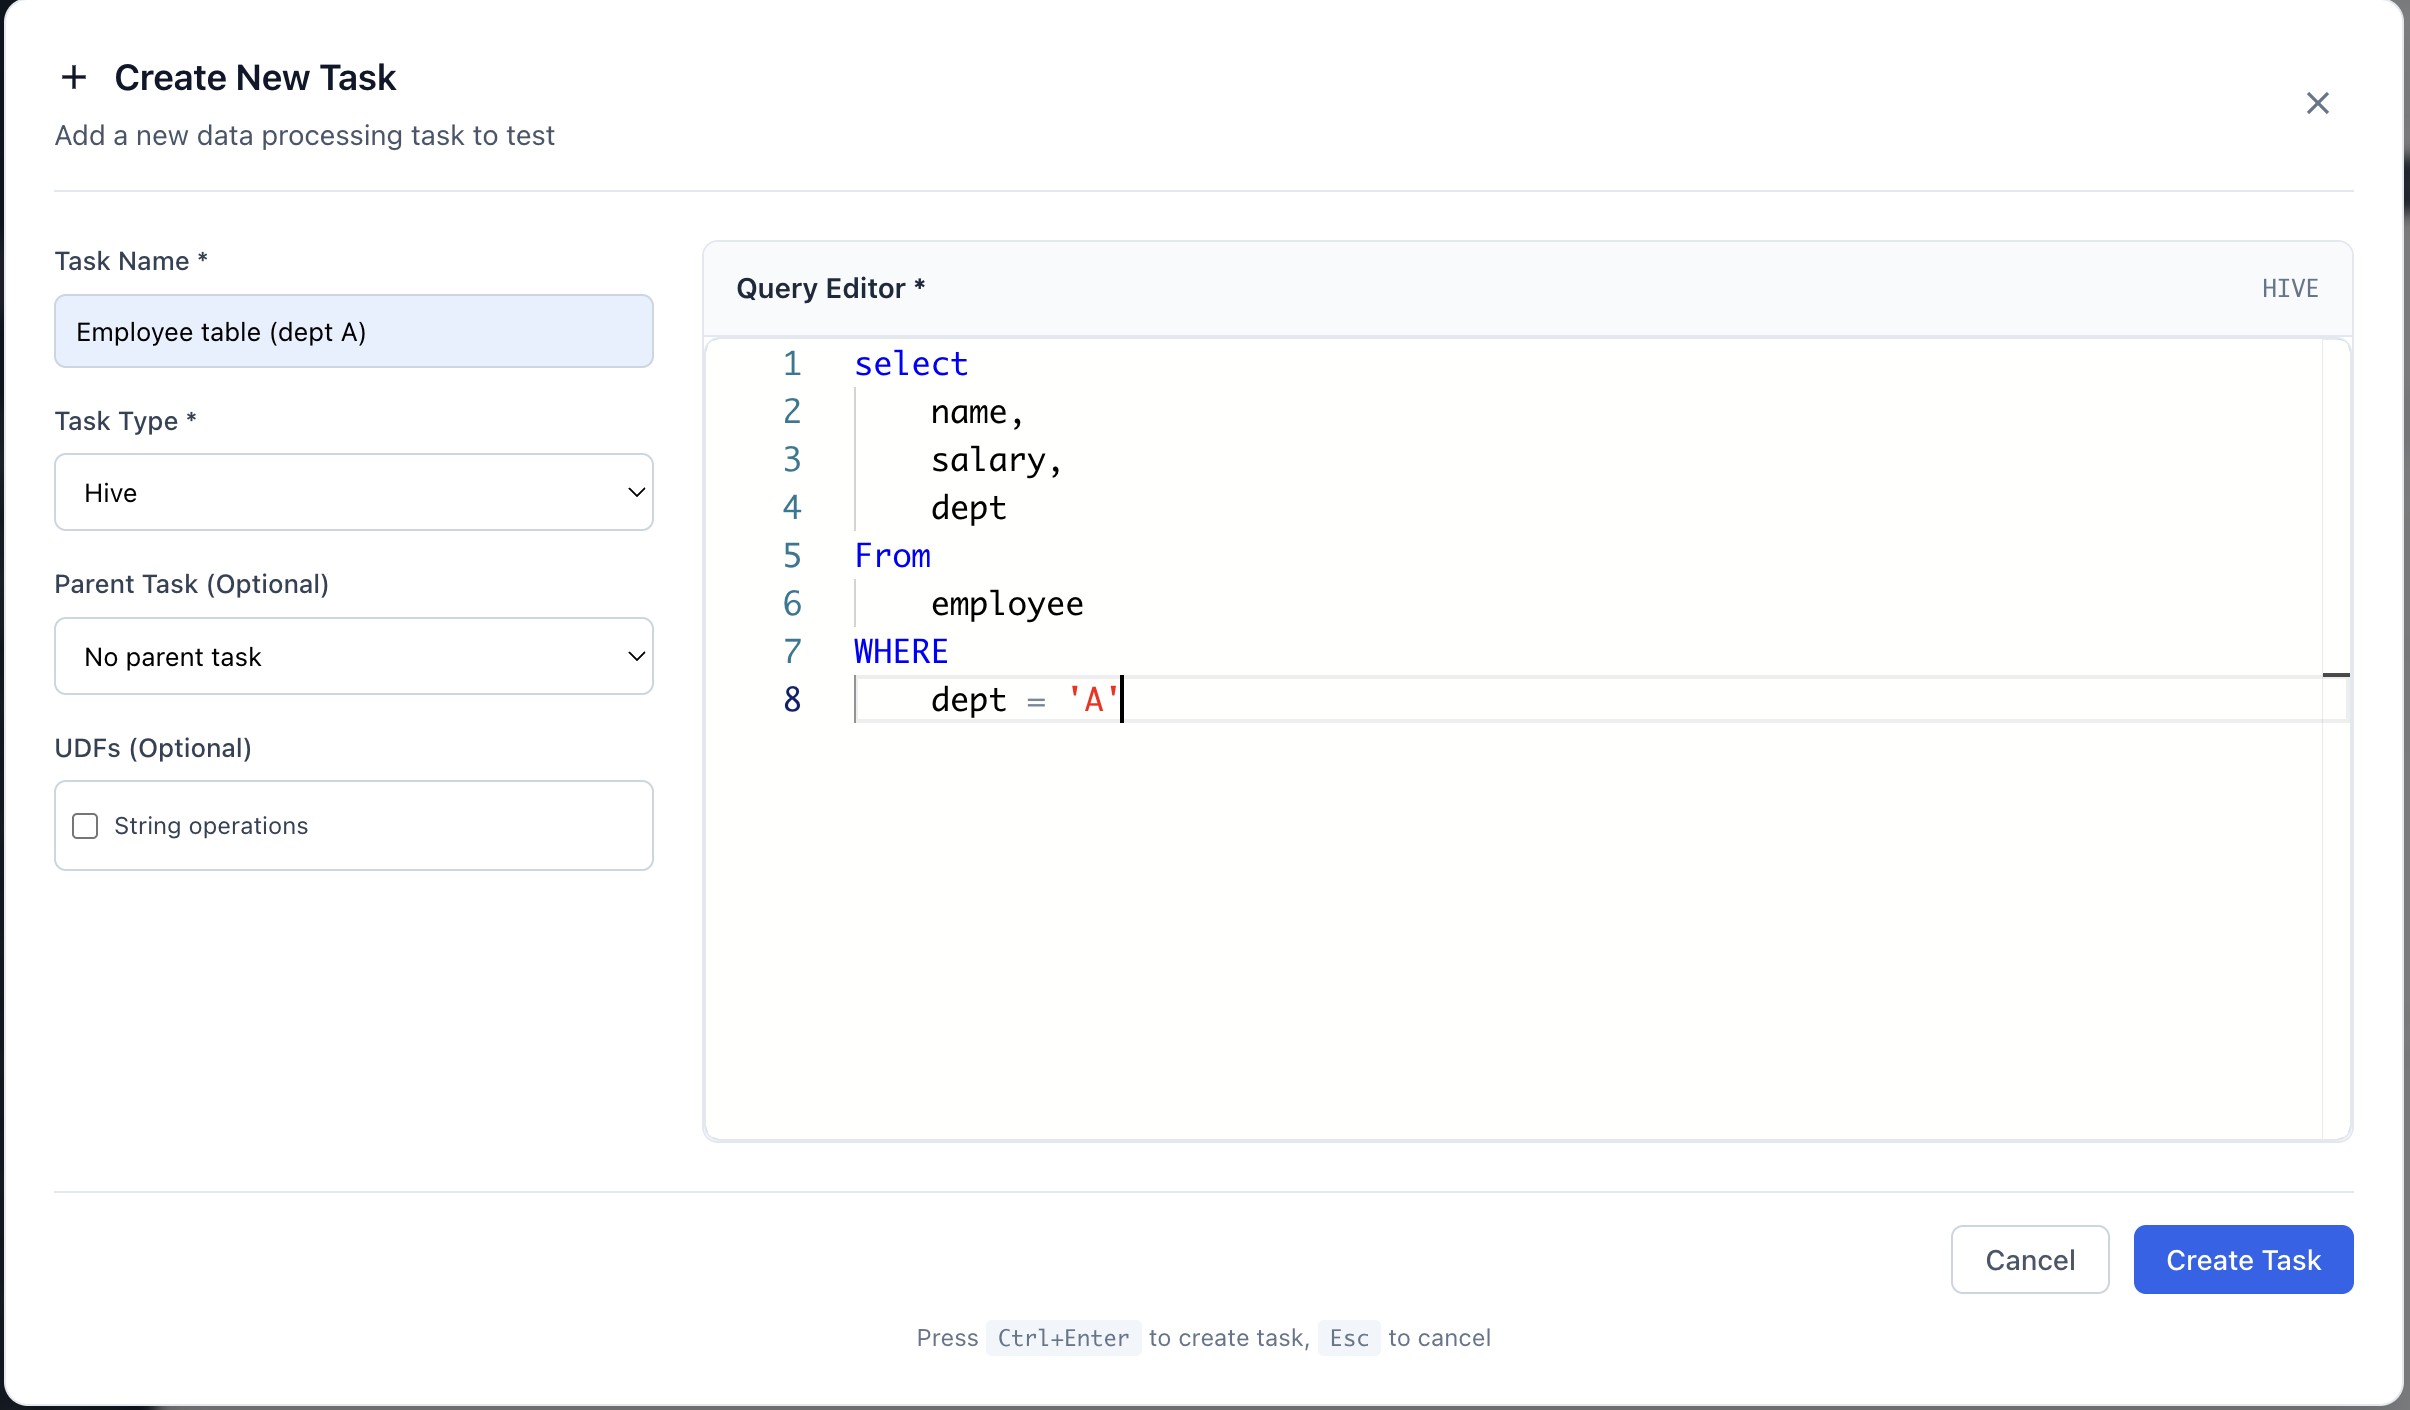
- Hive: For data warehousing queries
- Presto: For interactive analytics
- Spark SQL: For distributed SQL processing
- PySpark: For Python-based Spark jobs
- MySQL: For direct database queries
View Your Tasks
After creating tasks, they appear in the task list with their type, status, and parent relationships.

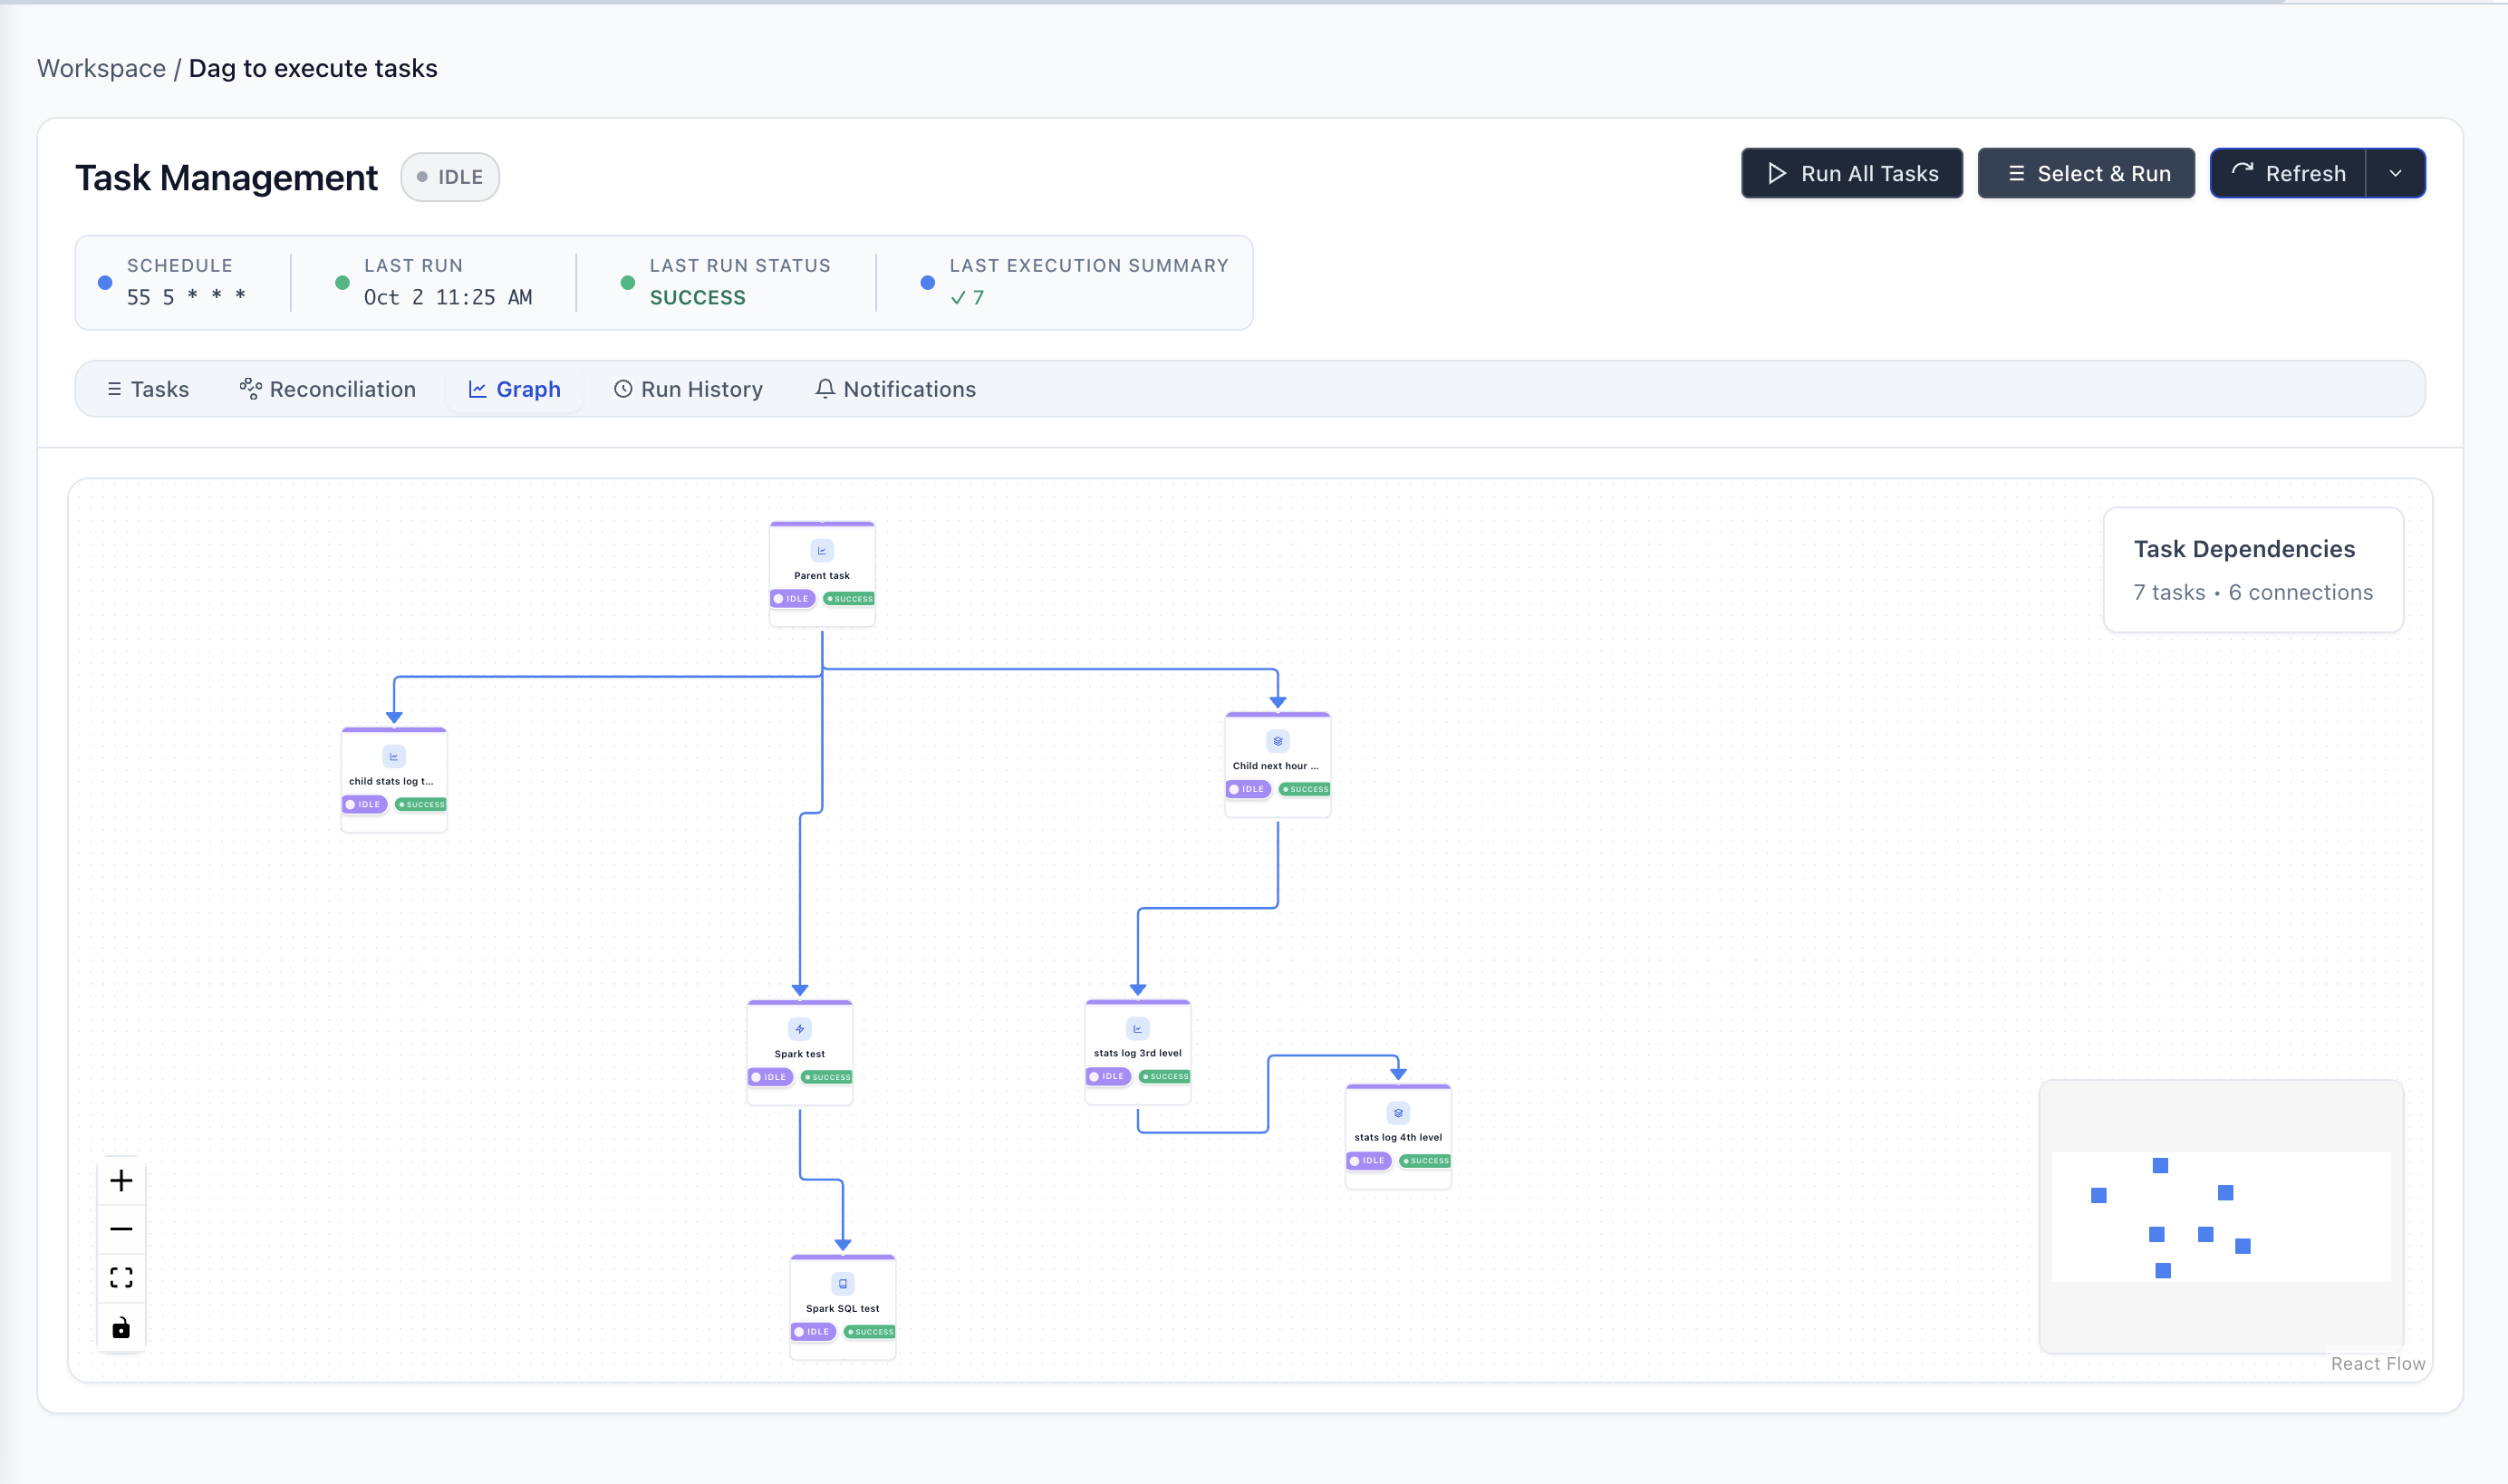
Visualize Your DAG
Click the "Graph" tab to see a visual representation of your task dependencies.
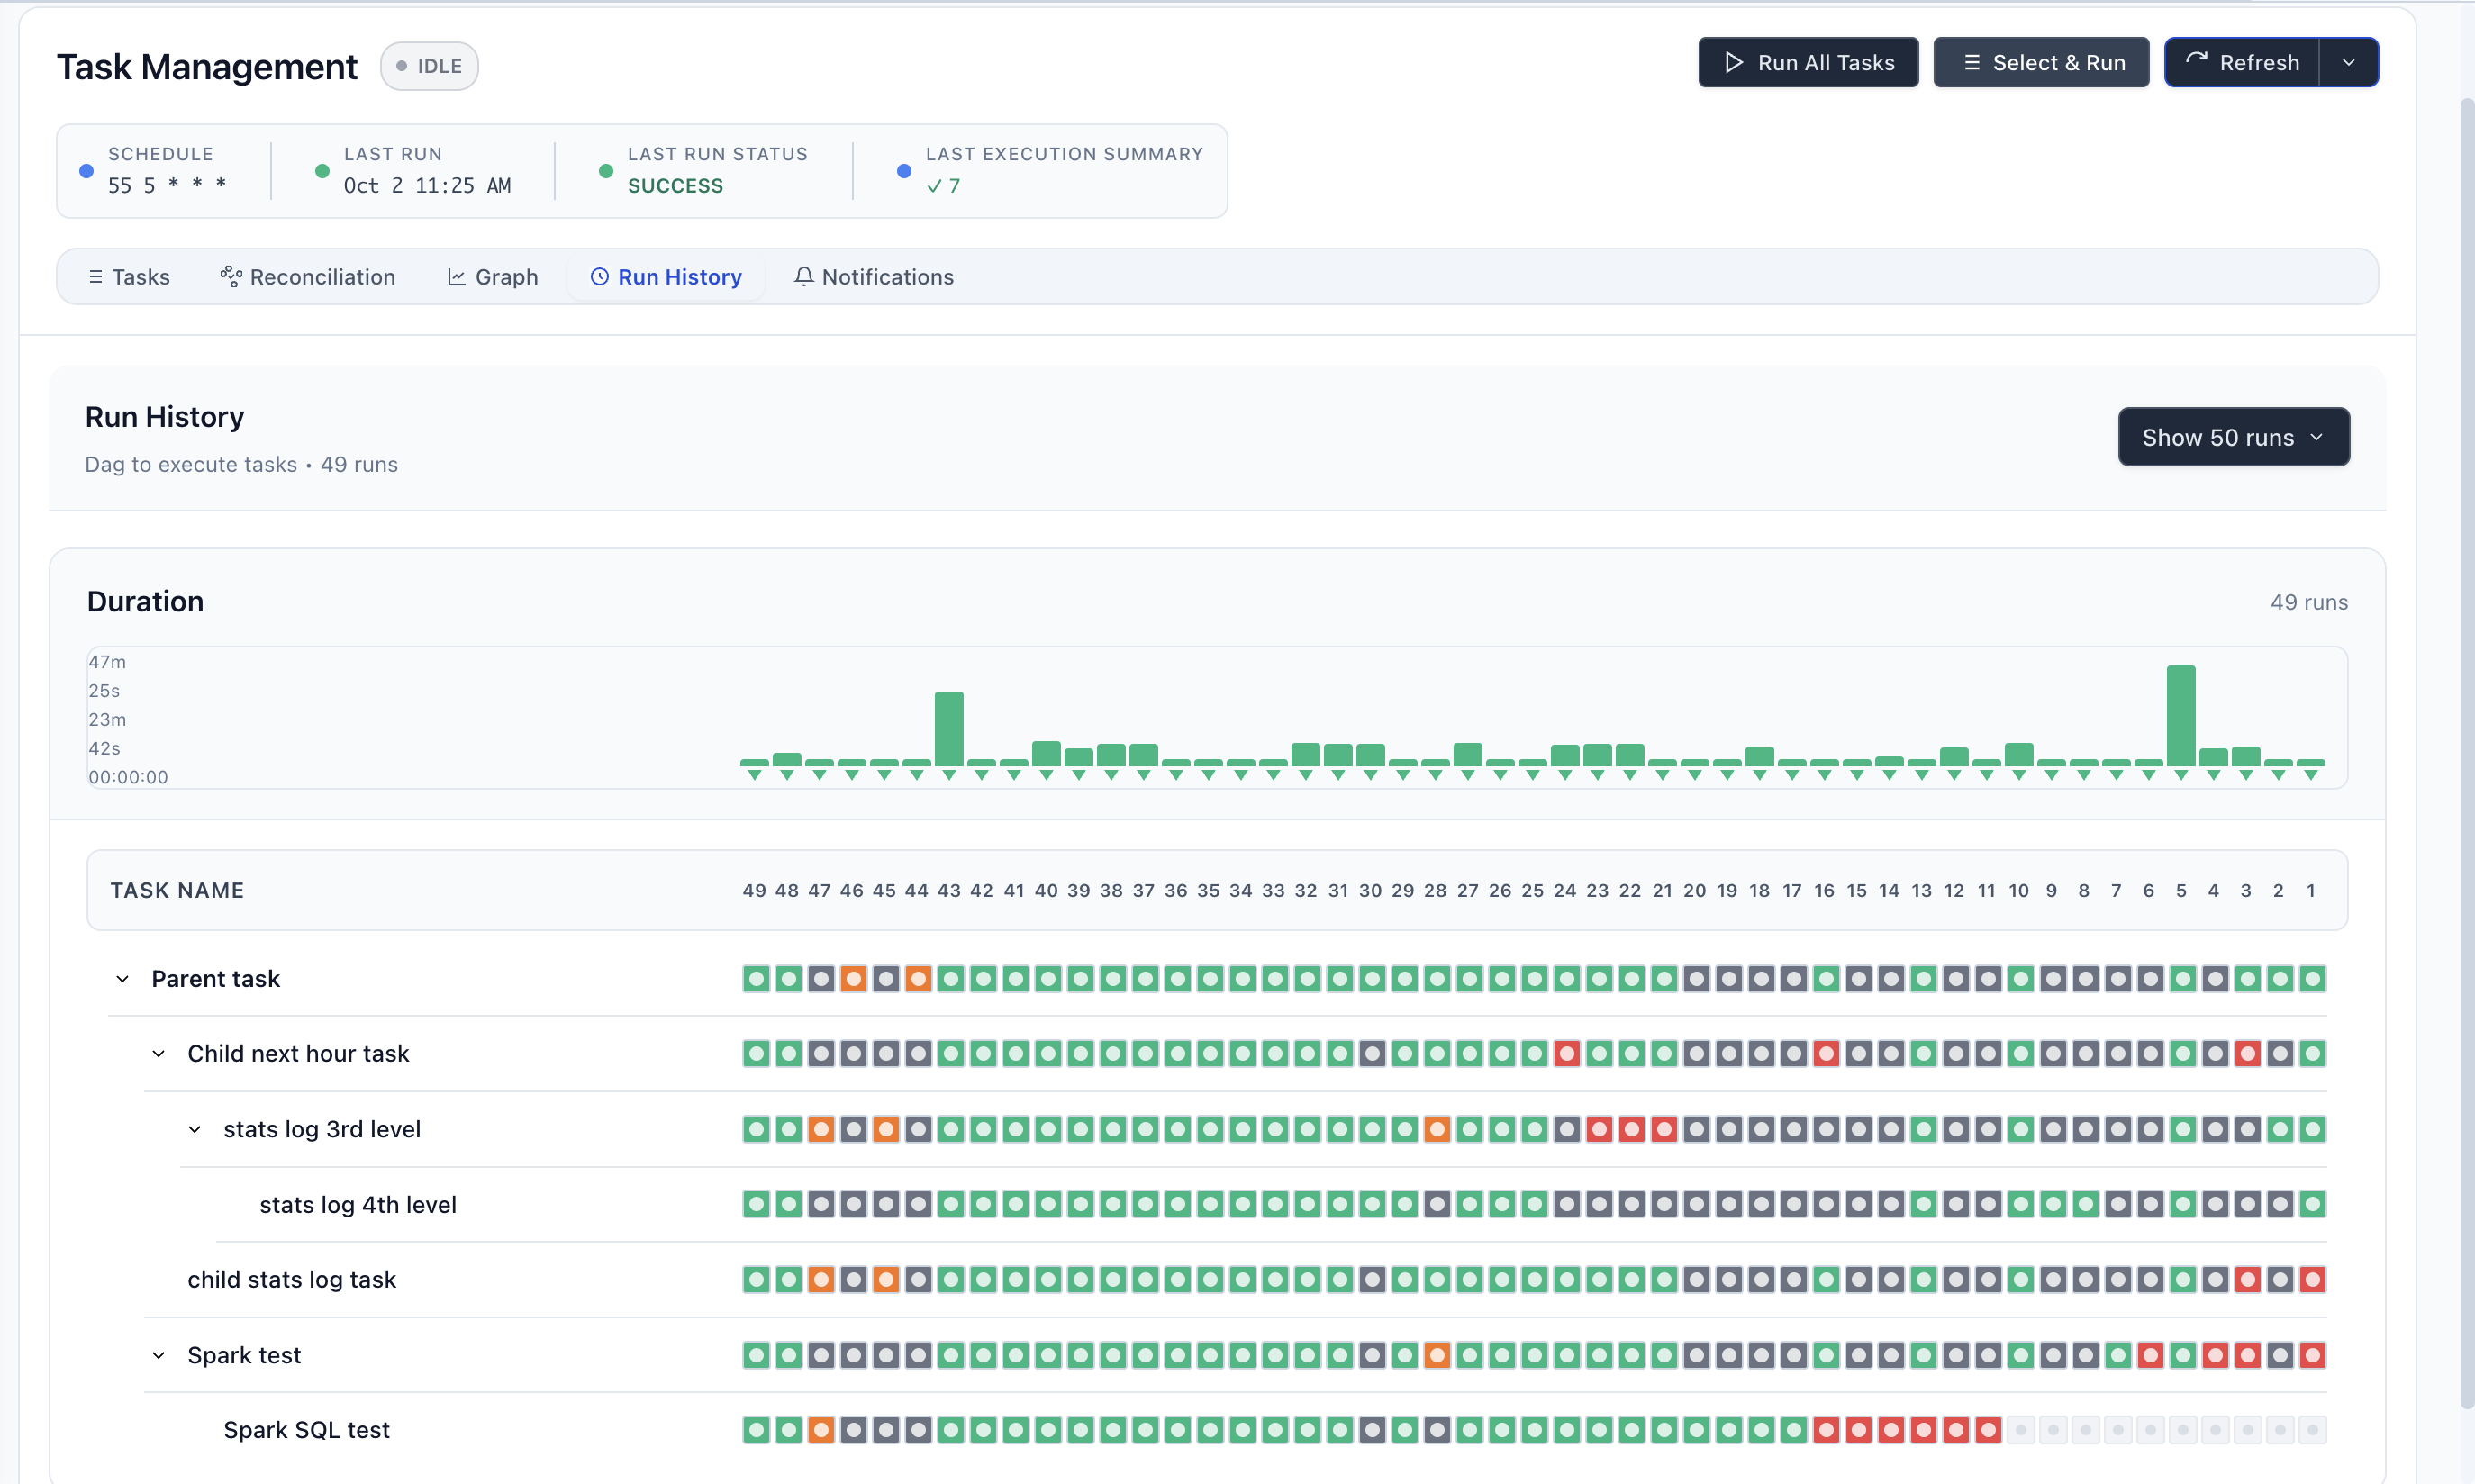
Track Execution History
The "Run History" tab shows all past executions with duration charts and per-task status.
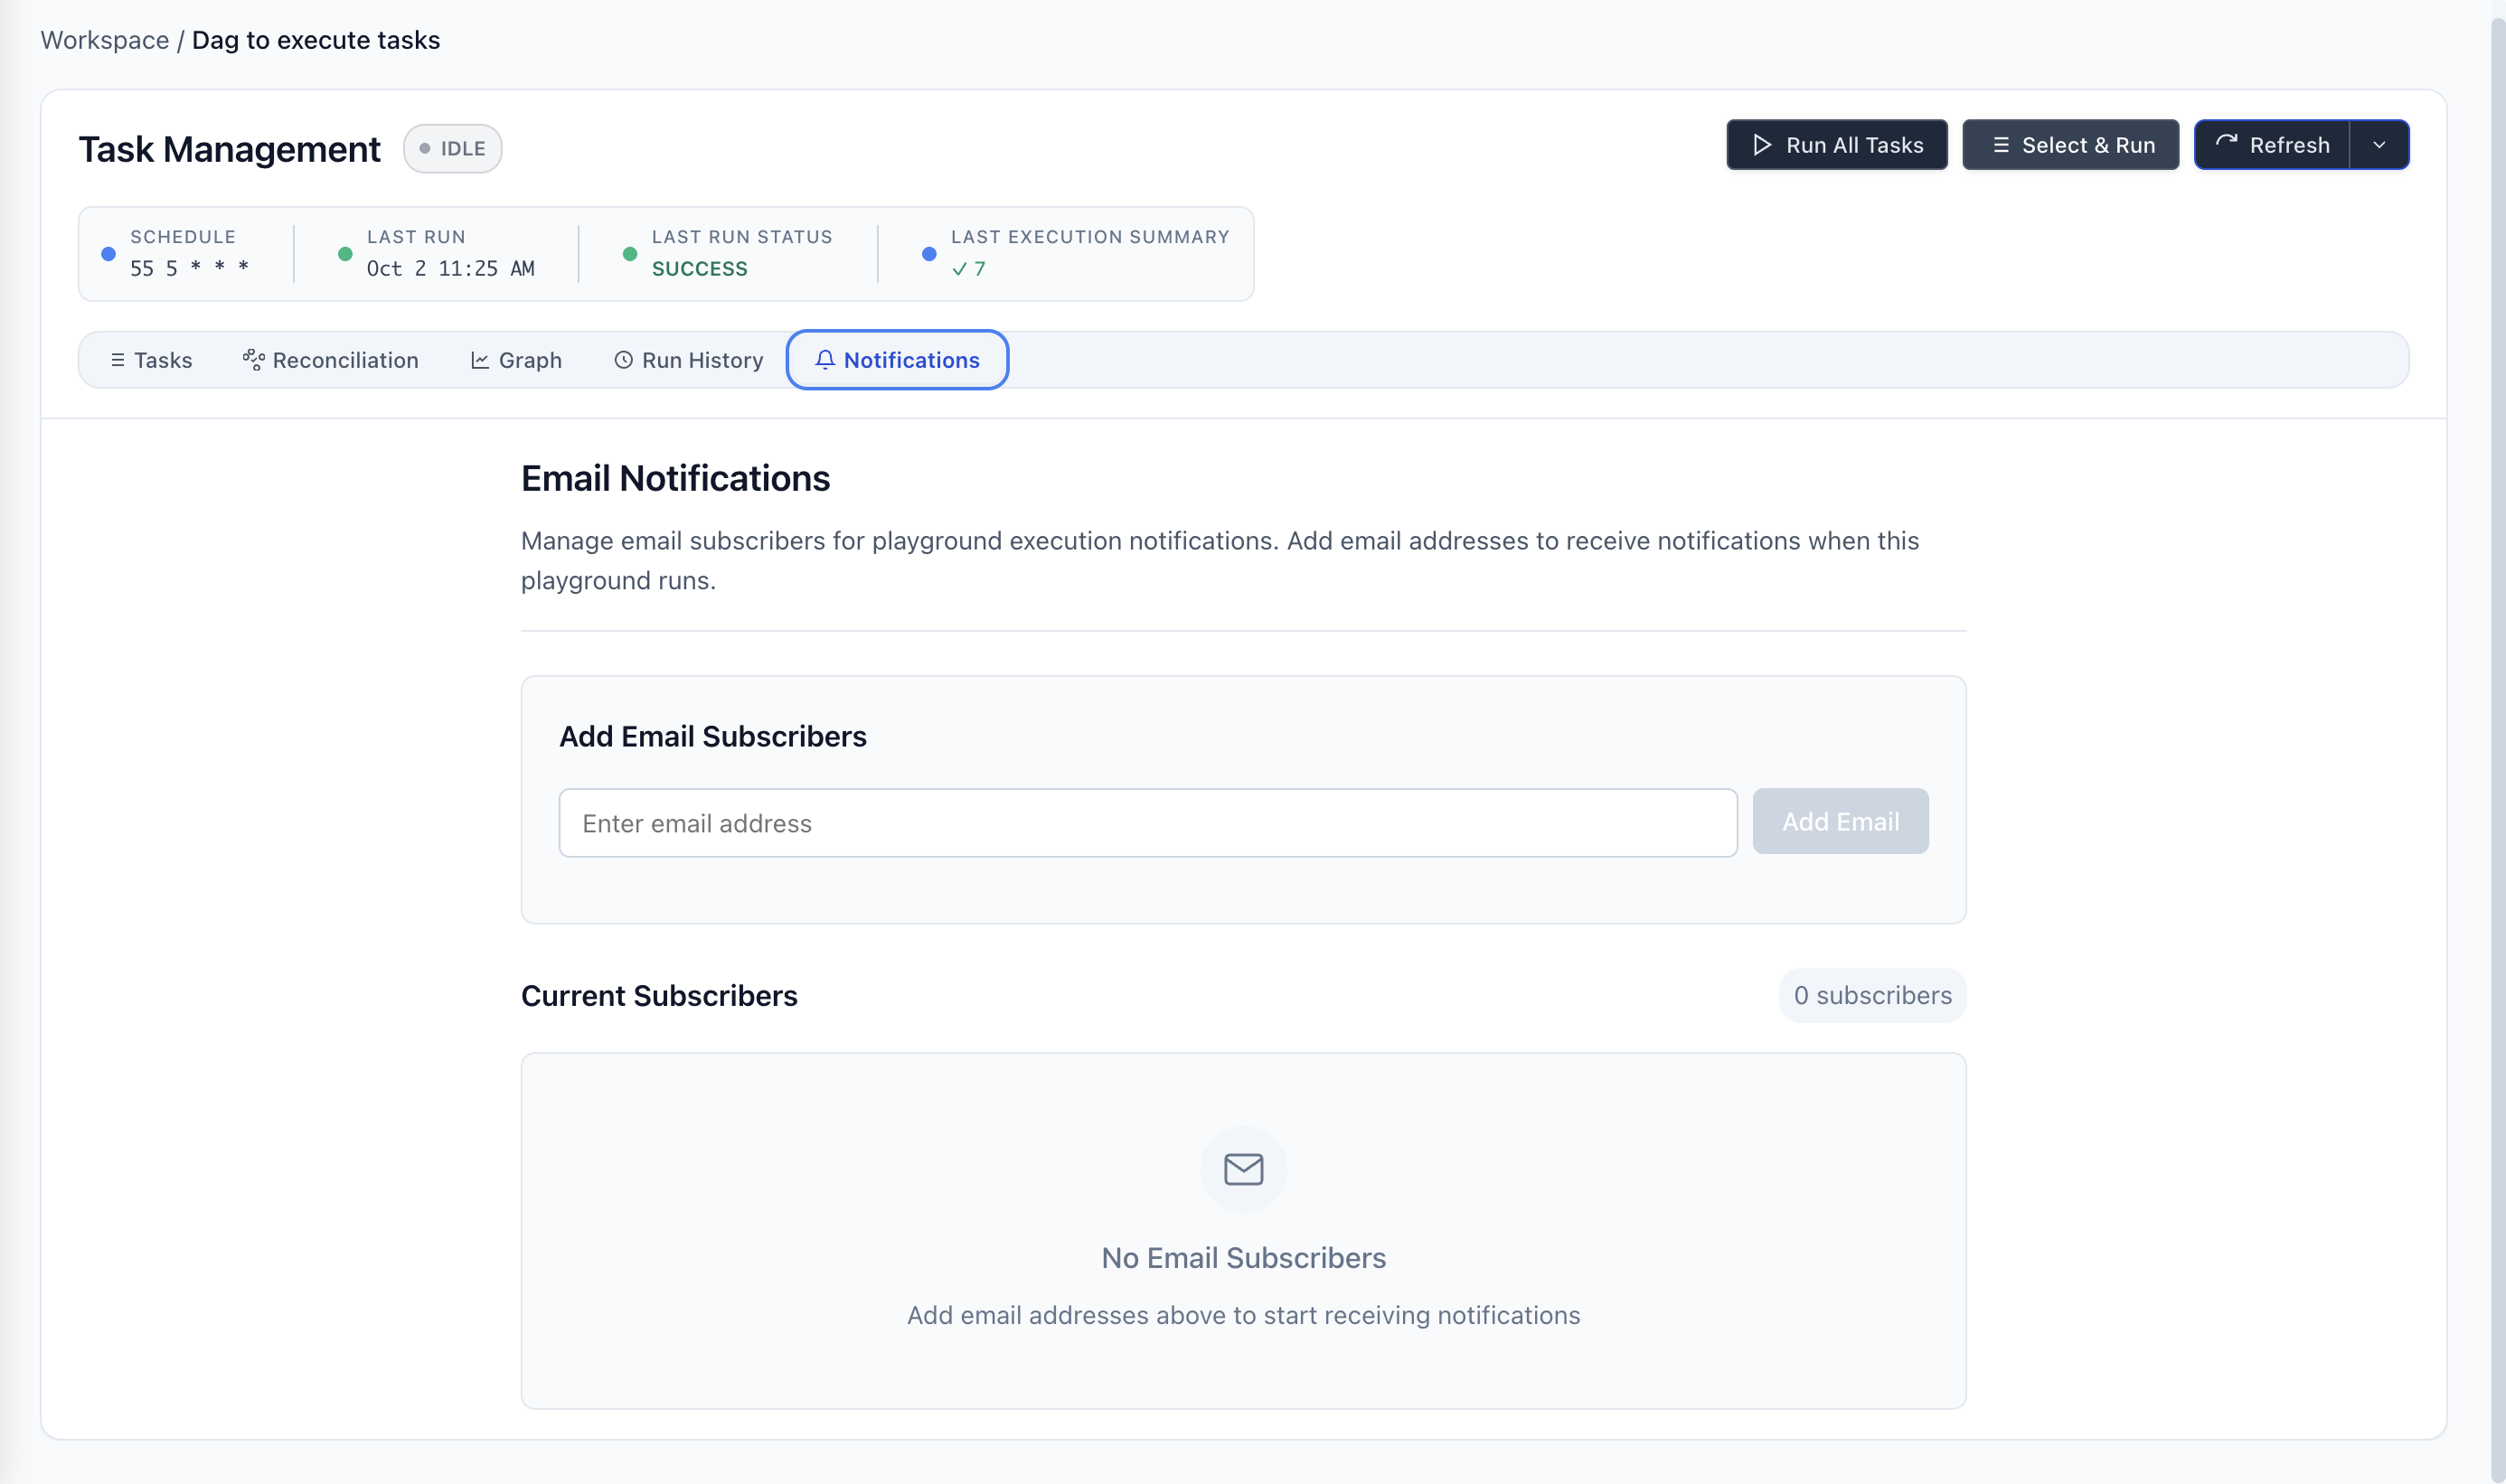
Set Up Email Notifications
Configure email subscribers to receive execution reports via AWS SES.
# Configure AWS SES in config-dev.yml

# ============================================
# AWS SES Configuration for Notifications
# ============================================
notification:
  aws_ses:
    access_key: your-access-key
    secret_key: your-secret-key
    from: noreply@yourdomain.com
    to: admin@yourdomain.com
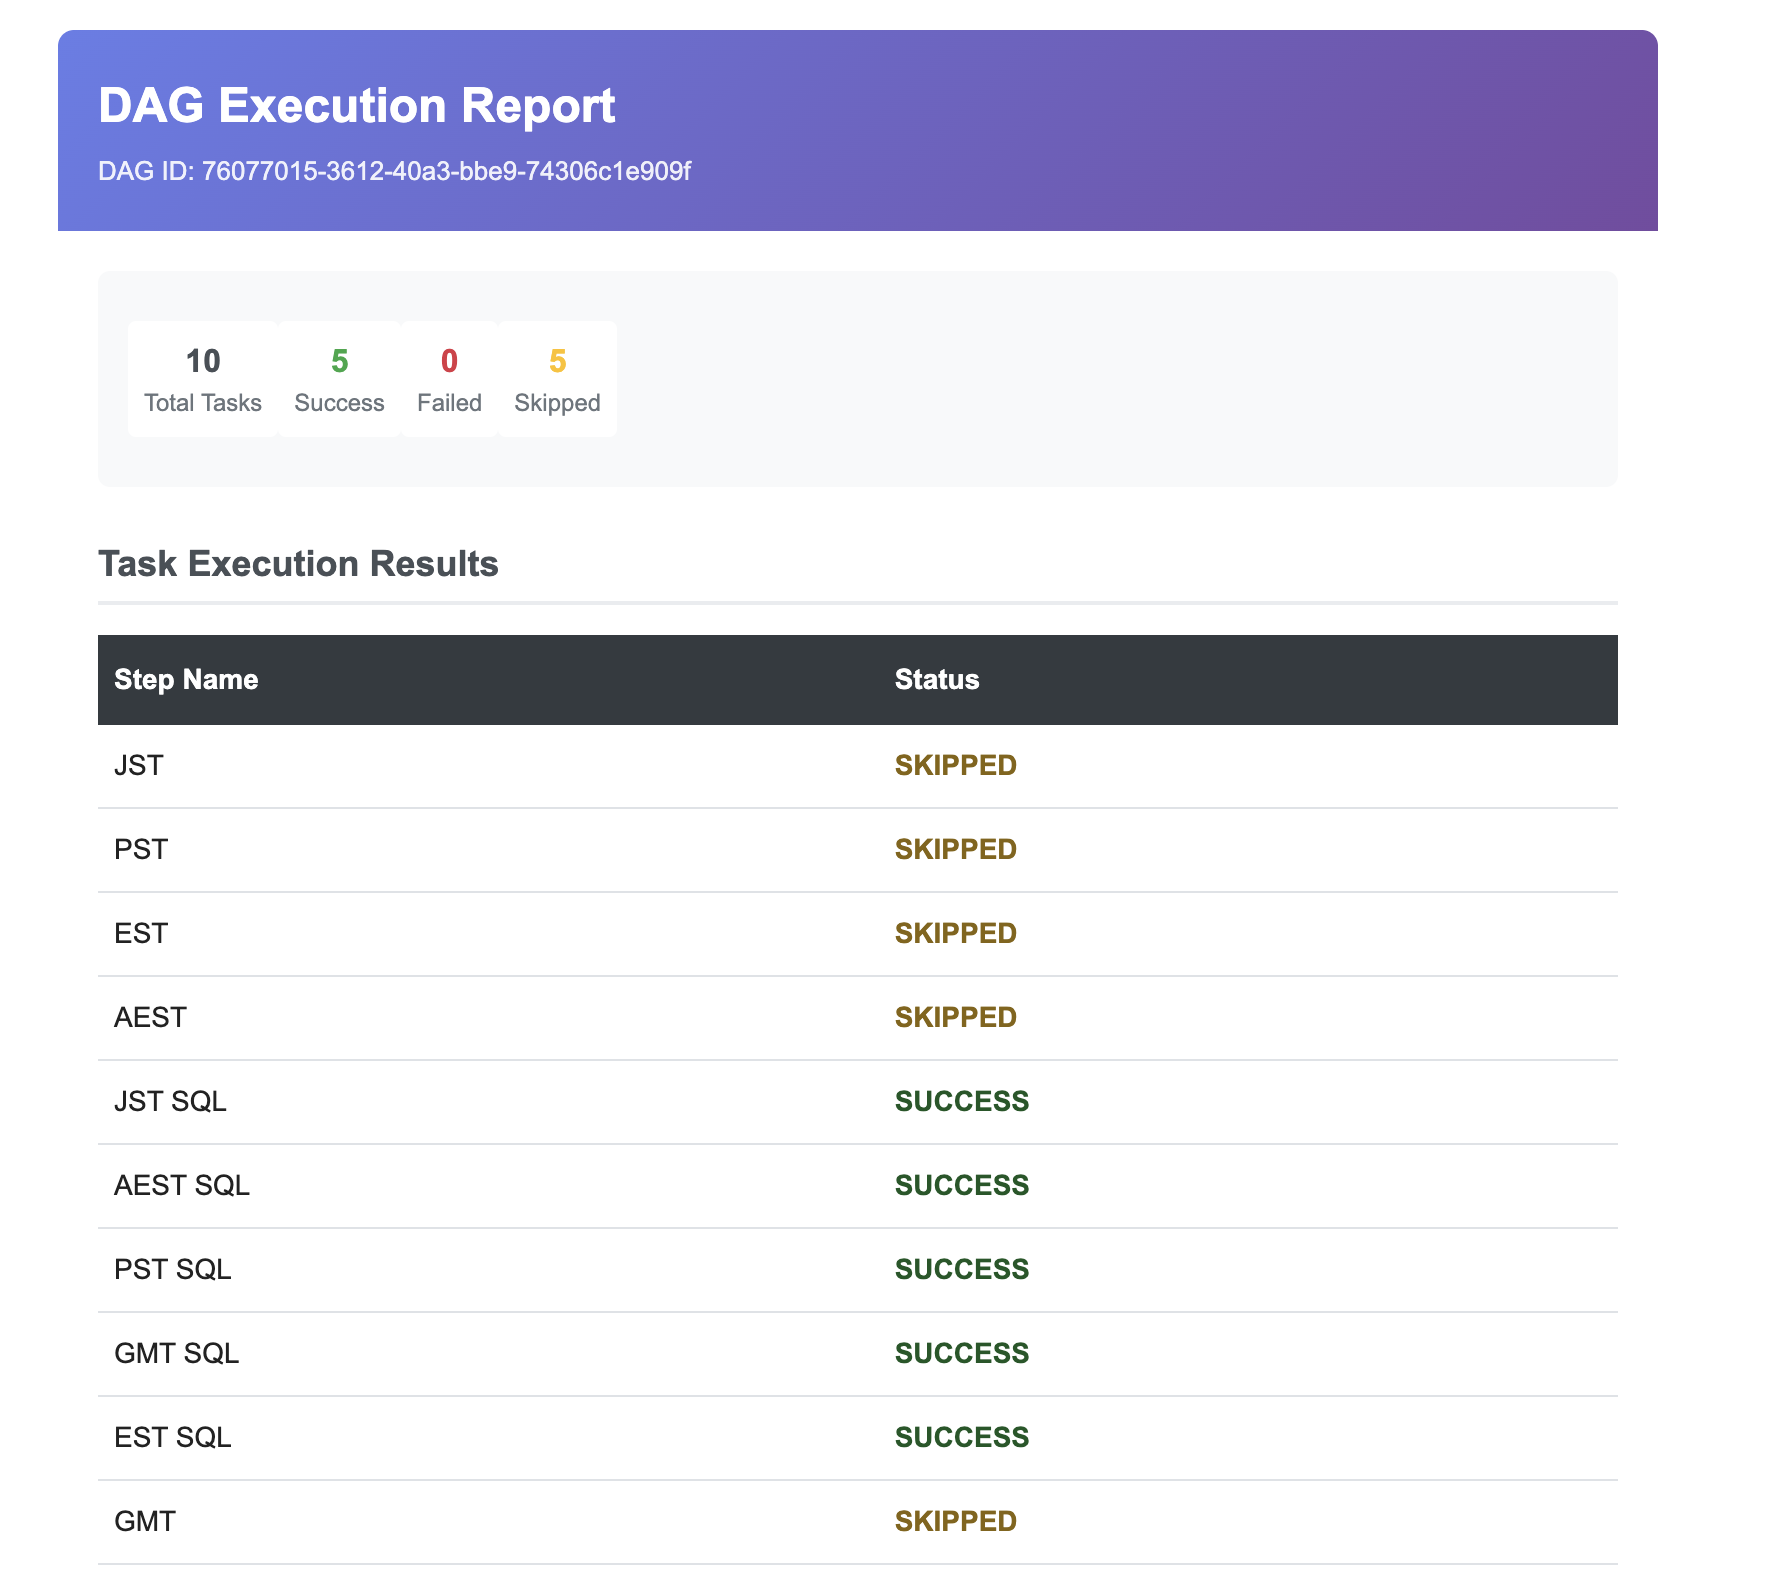
Receive Execution Reports
Subscribers receive detailed HTML email reports after each playground execution, showing task results and reconciliation metrics.
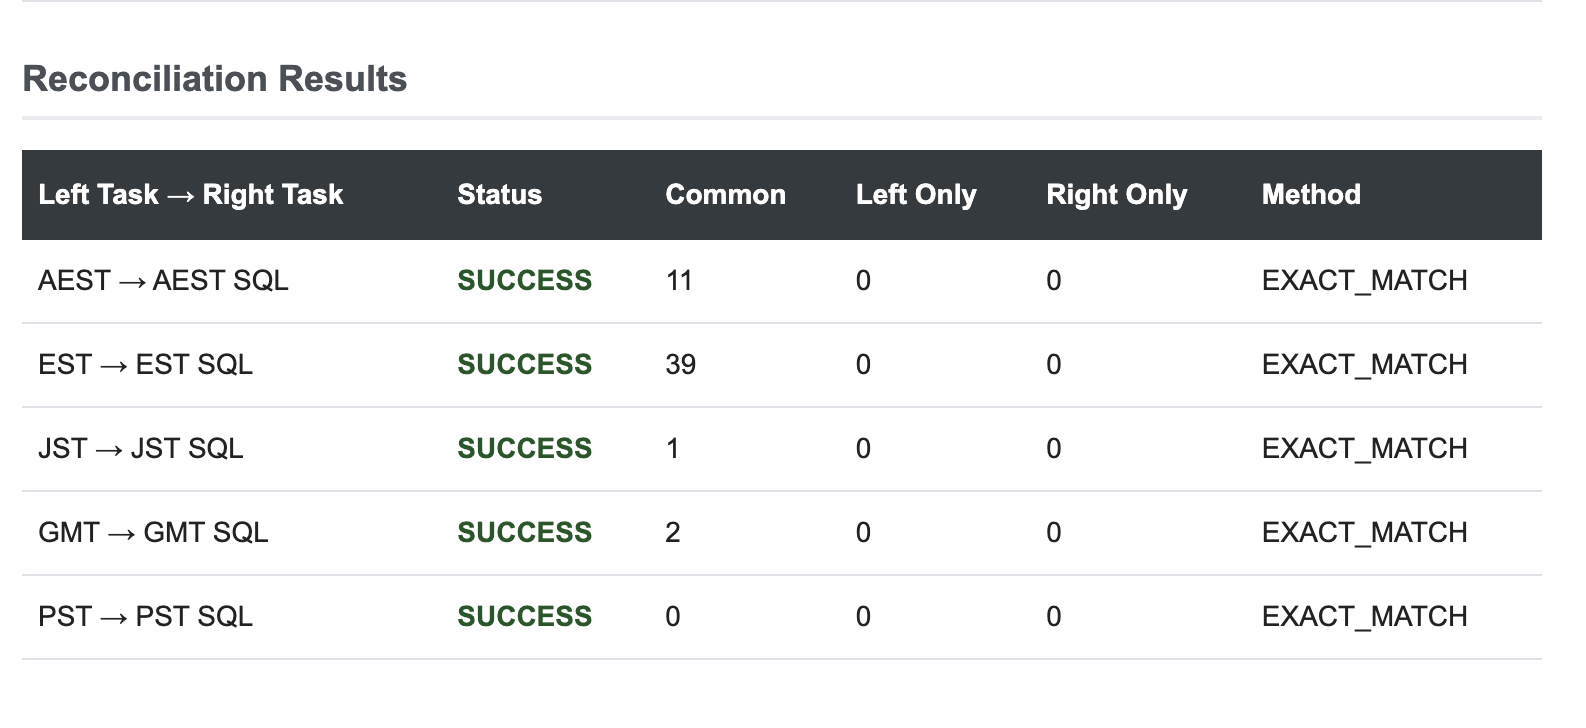
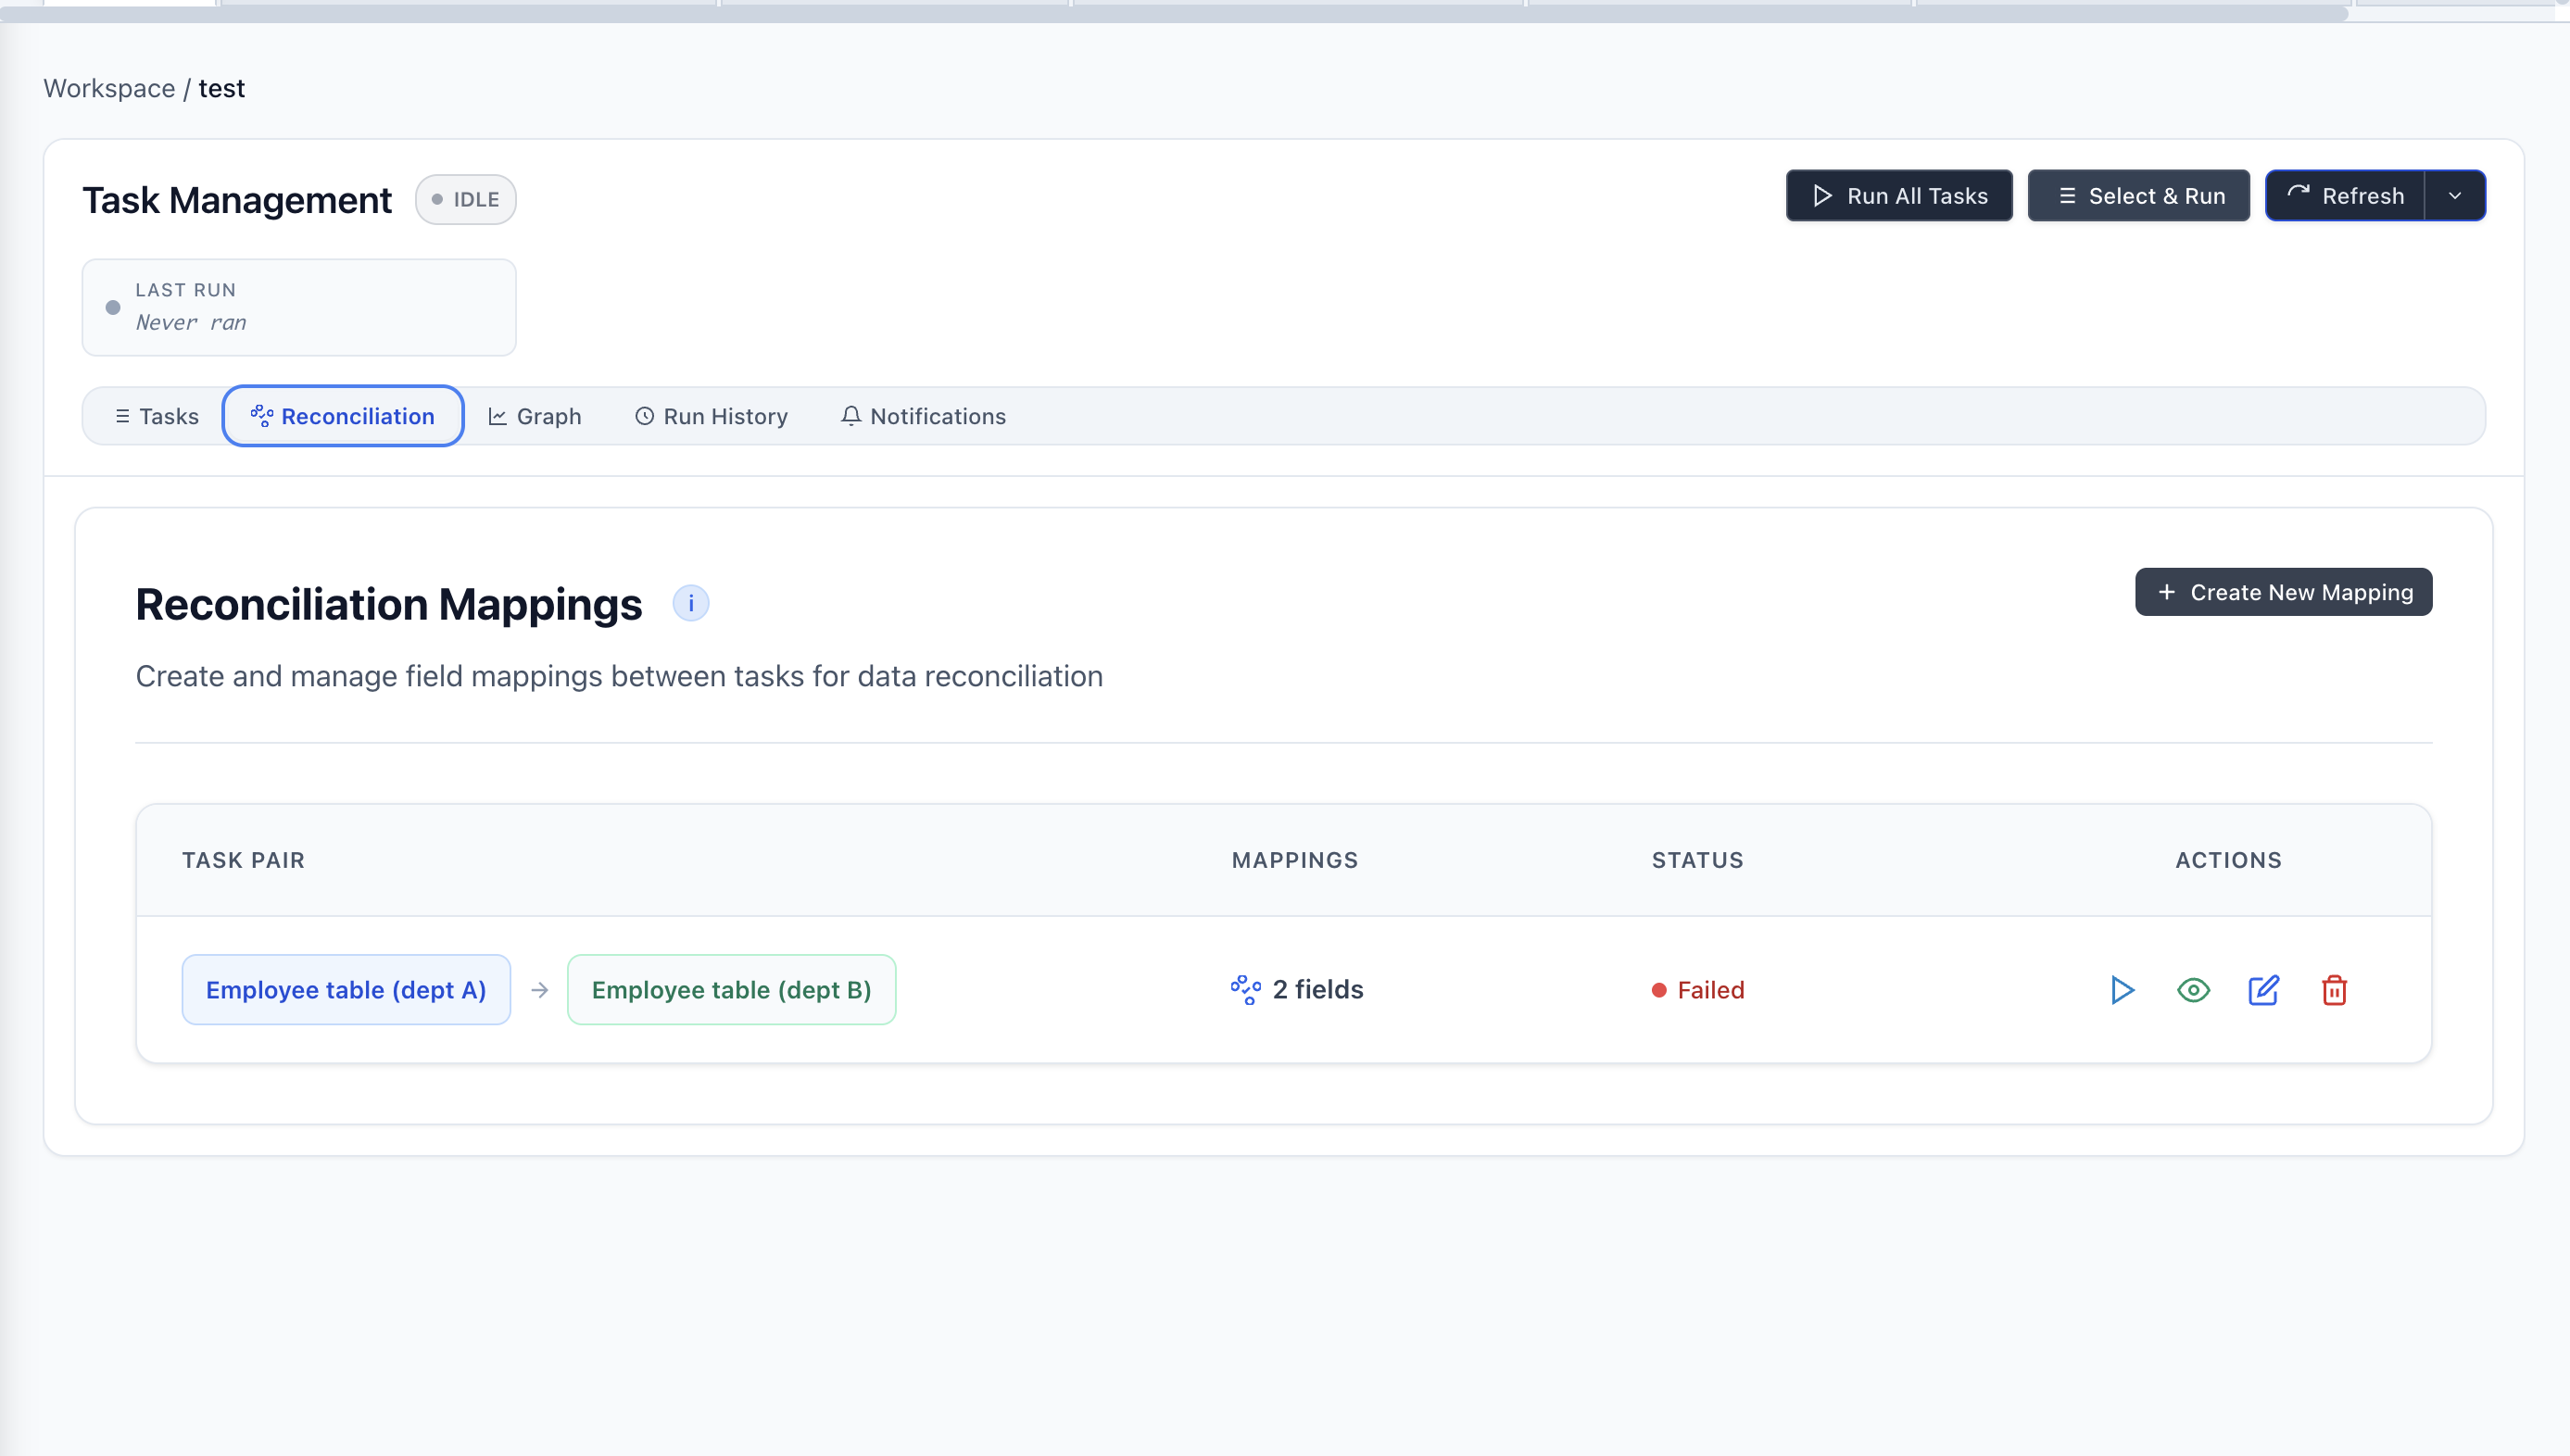
Set Up Data Reconciliation
Validate data consistency between tasks using reconciliation mappings.
- Files < 1MB: Exact matching (100% accurate)
- Files > 1MB: Probabilistic matching using Bloom filters (memory efficient)
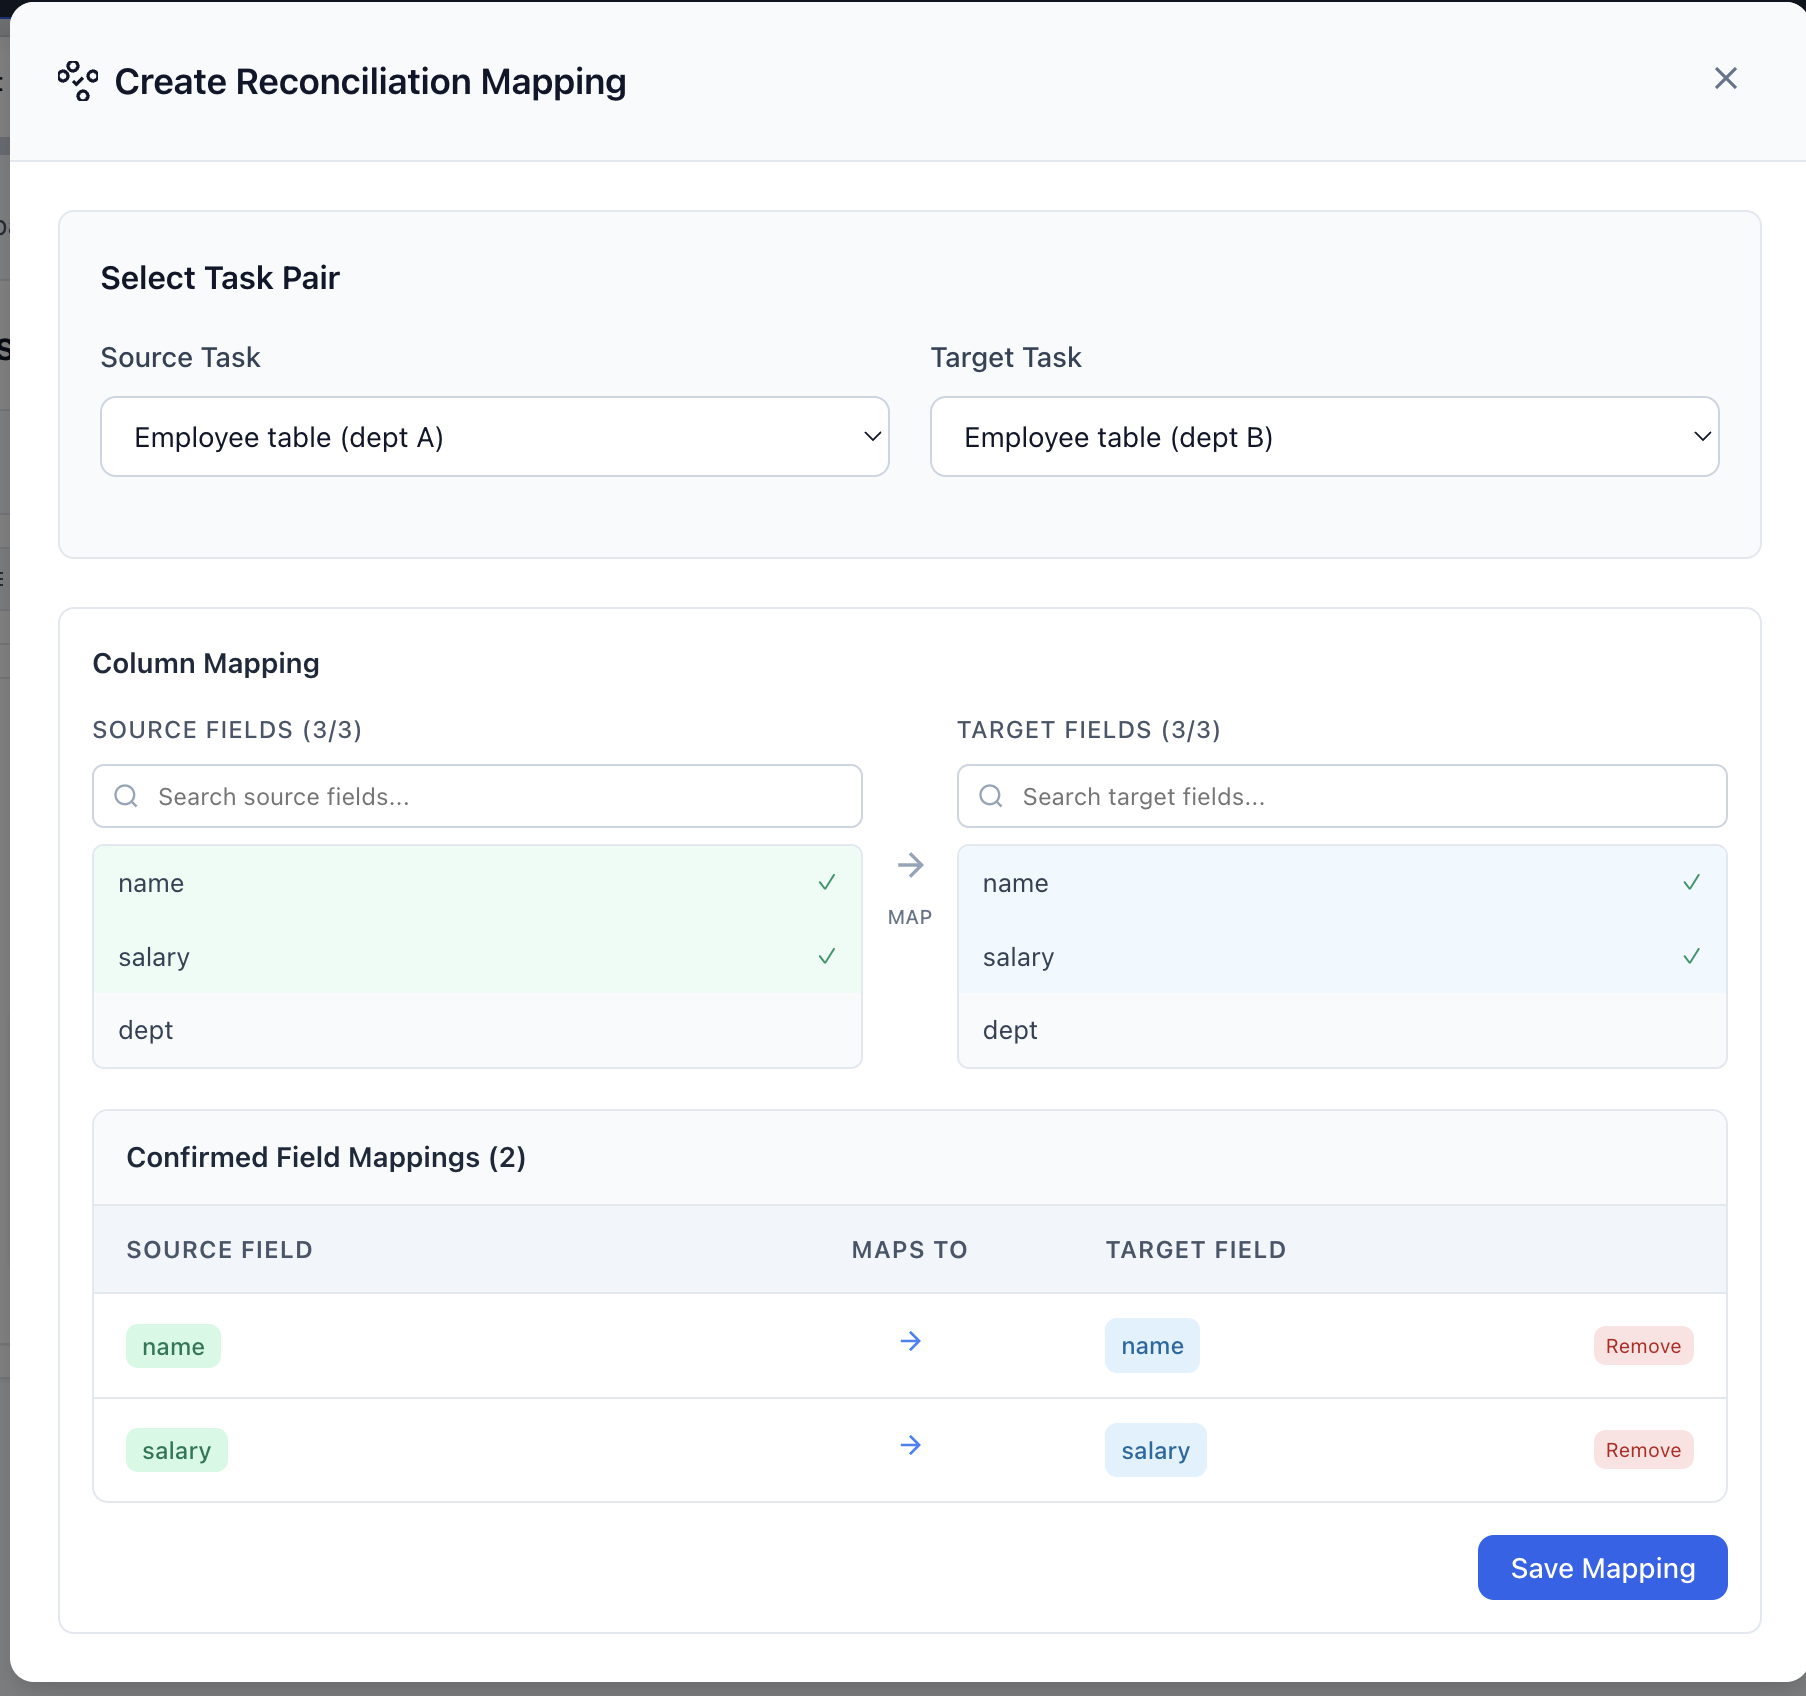
Create Reconciliation Mapping
Select source and target tasks to compare their outputs, then define which columns to compare between them.
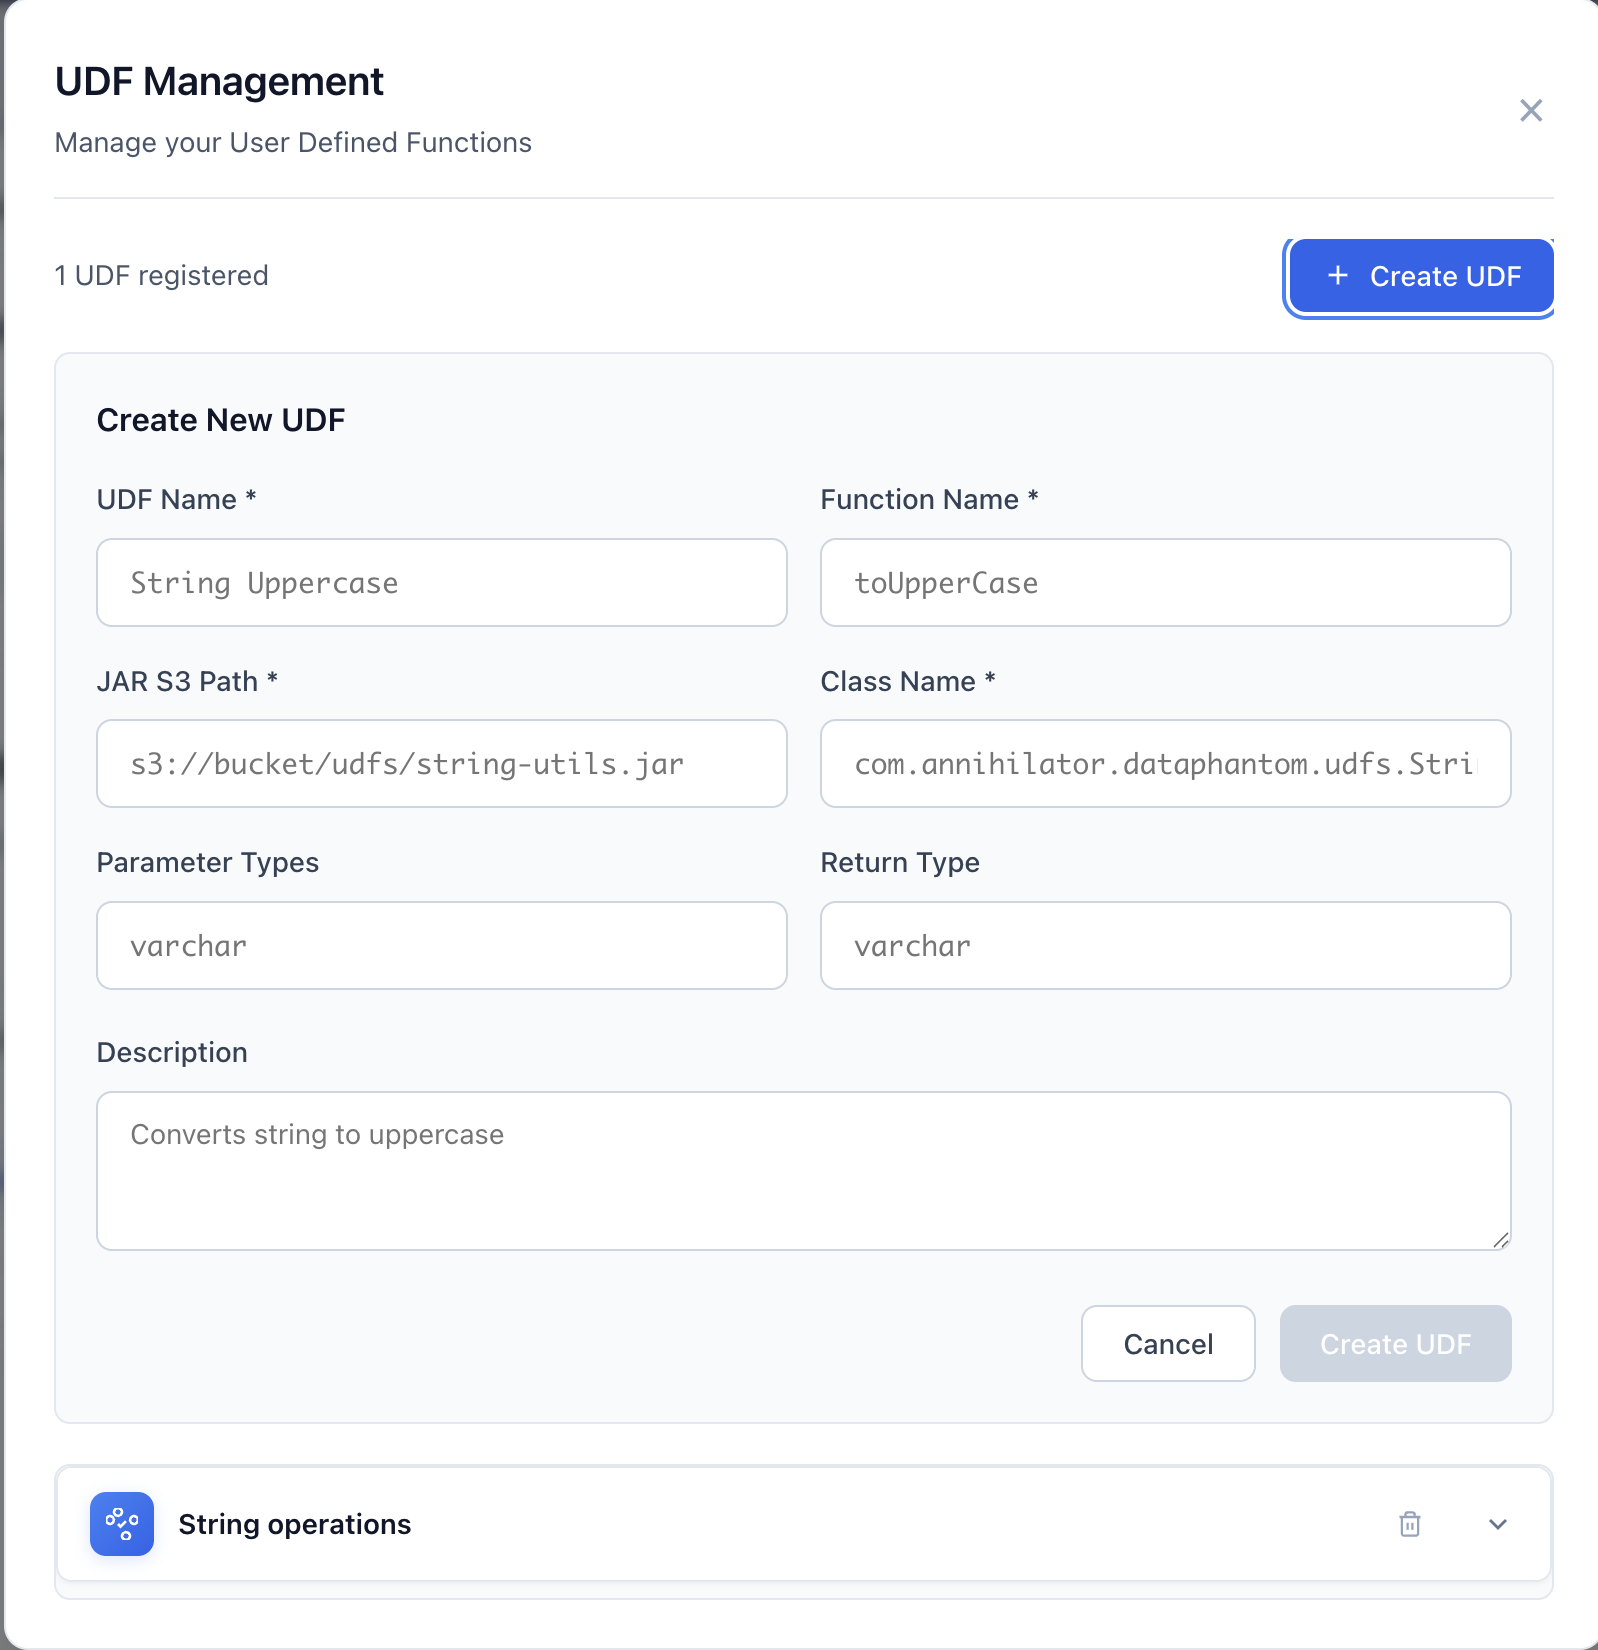
Manage User-Defined Functions
Create and manage UDFs (User-Defined Functions) that can be reused across your tasks in queries.
Congratulations!
You've completed the quick start guide and learned how to:
- Log in and navigate the dashboard
- Create playgrounds and tasks
- Build workflows with task dependencies
- Visualize your DAG
- Monitor execution history
- Set up email notifications
- Configure data reconciliation
What's Next?
If you encounter any issues or have questions:
- Check the Getting Started guide for installation issues
- Review the Configuration guide for setup problems
- Visit the GitHub repository to report bugs or request features